
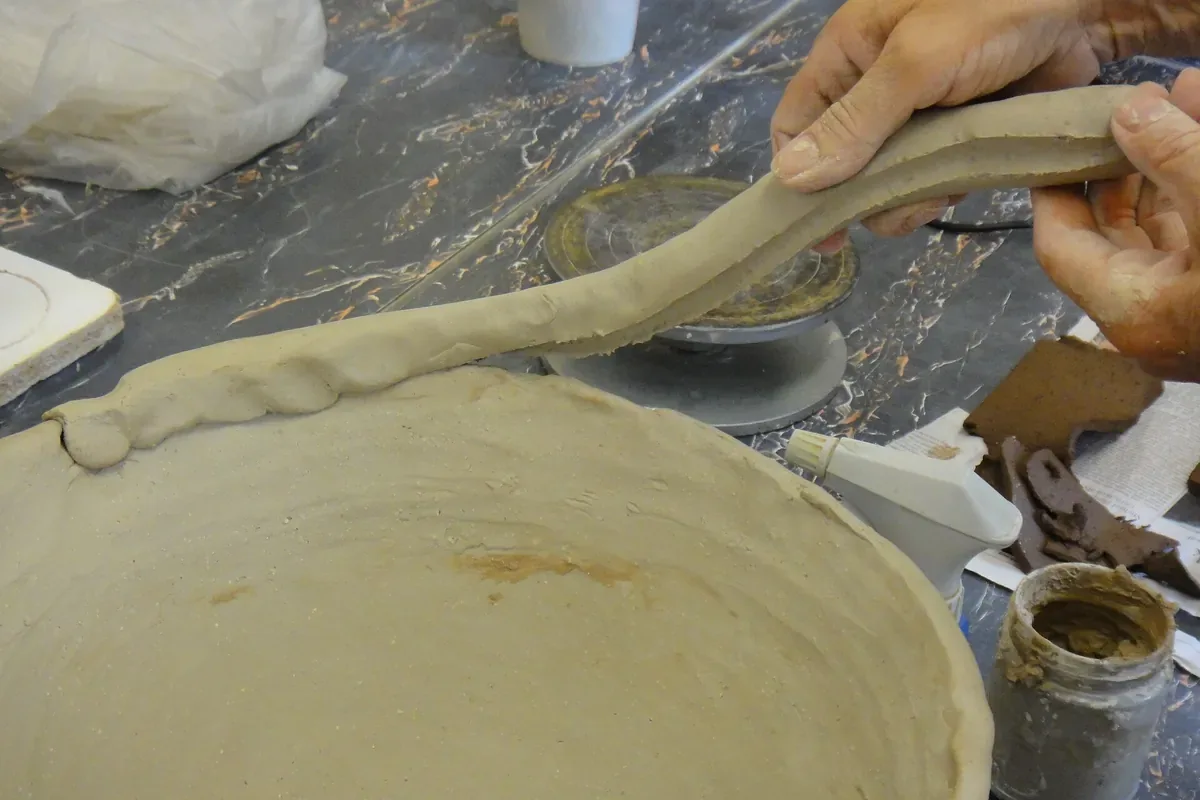
Coil pottery, or coil building, means building the wall of a piece by adding coils of clay and blending the joints until they form one continuous wall. Stacking coils is not enough: the work is in the joint. In return, the method lets you decide the profile as you go up, without a wheel: it is the classic way to make a coil pot.
This article goes deeper into the coil building introduced in our guide to hand-building without a wheel. If the piece fits in a single ball of clay, pinching is usually simpler.
Coil, wall and height are not the same measurement
Three measurements confuse beginners: d, the diameter of the coil before it goes into the piece; t, the wall thickness after it has been seated, joined and thinned; and h, the height added by one course (a ring or layer of coils). Seating and pinching change the cross-section; scraping removes some material. AMACO, for example, teaches starting with thick coils that, once joined, are pinched upward and thinned. A 1 cm diameter coil does not determine a 1 cm thick wall, nor does it necessarily add 1 cm of height.
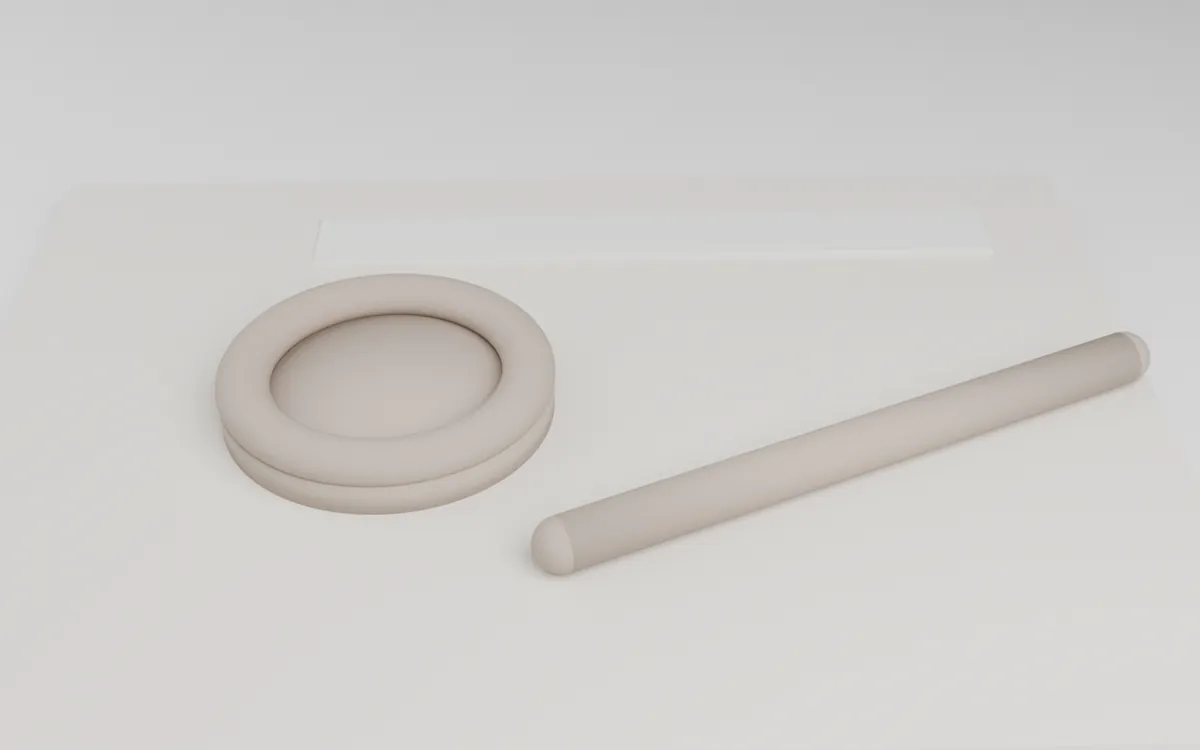
Test ring: measure the coil before and the band after joining, with the same clay. Illustrative SenseCraft render with simulated clay; not to scale. No measured dimensions are provided.
To learn this relationship for your clay, make a test ring: measure d at two points, seat and join the ring on a small disk, and measure t and h at four points, noting where you measured. The measurements apply only to the clay body, the way you worked it, and its moisture and firmness at the time; they are not a conversion factor for other pieces.
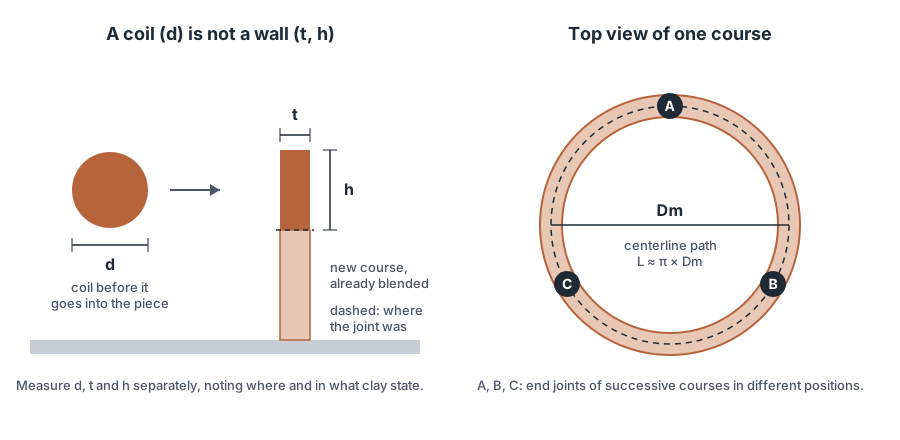
SenseCraft teaching diagram, not to scale and with no universal measurements.
Before you start: clay and workbench
Use a known ceramic clay body suitable for handbuilding and compatible with the planned firing temperature and the kiln operator’s requirements. Start with one clay body. A good clay for coils bends without cracking and still holds its profile while you join: too soft, it sags under the weight of the courses; too stiff, it splits when rolled. Test it on a scrap.
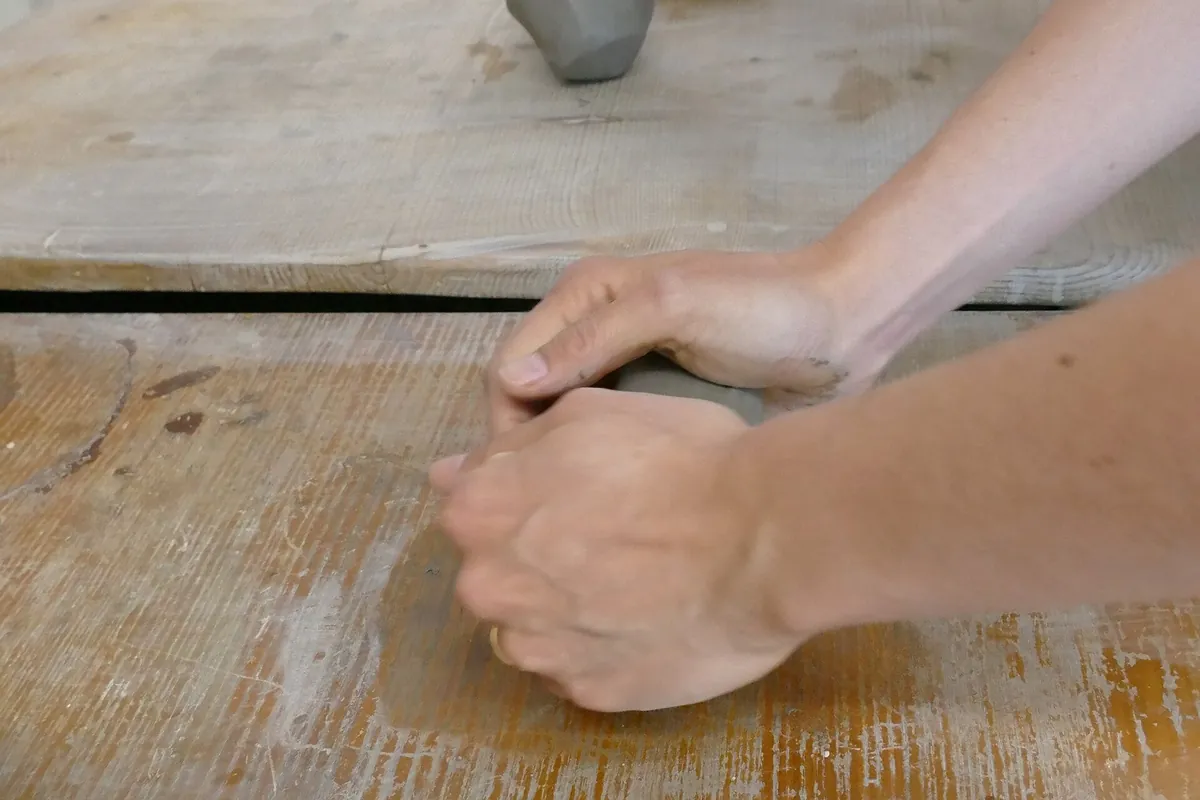
Clay being kneaded on the bench before use. Photo: Kritzolina, CC BY-SA 4.0, via Wikimedia Commons; resized.

Essentials: a rigid board you can carry, a smooth rolling surface (one that does not stick or dry the clay quickly), plastic to cover, a ruler, a rounded modeling tool, a scoring tool, a brush and joining slip (clay and water) made from the same clay. Optional: a rib, thickness calipers and a banding wheel.
How to roll a clay coil that works
Squeeze a portion in your hands into an elongated shape. On the bench, roll with your palms and spread fingers, starting with your hands together in the center and moving them out toward the ends, as Amy Simons describes in Pottery Making Illustrated. Keep the coil turning.
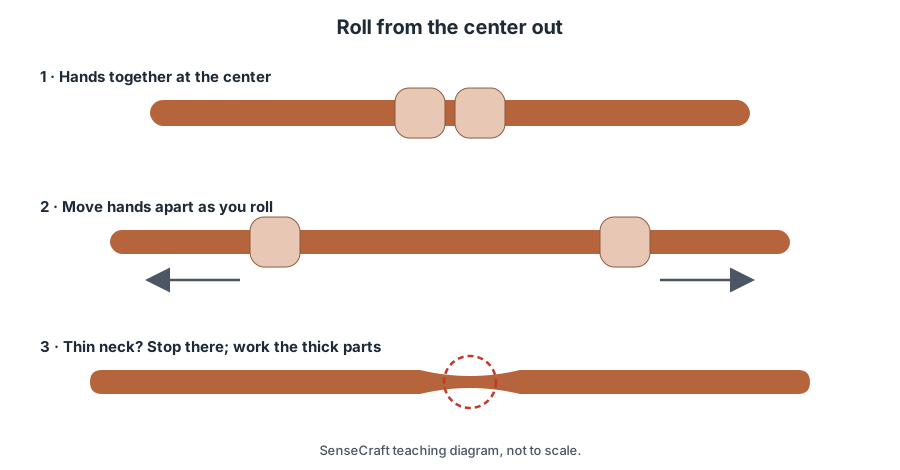
Start with your hands together at the center and move them apart as you roll; at a thin neck, stop rolling there. SenseCraft teaching diagram, not to scale.
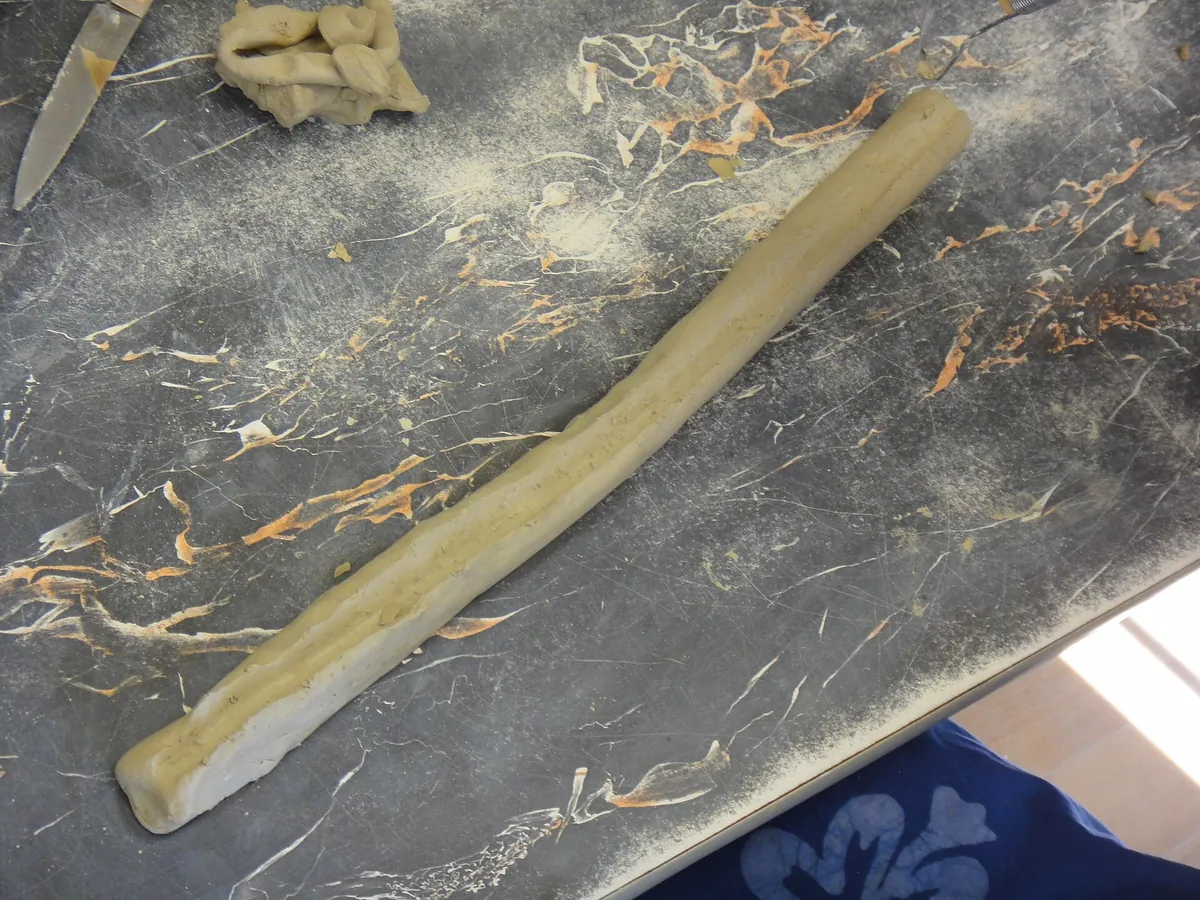
A finished coil on the bench: it does not have to be a perfect cylinder. Photo: Poupou l’quourouce, CC BY 3.0, via Wikimedia Commons; resized.

- Flattened? You are repeating a short arc on the same face. Get the coil turning again before pressing harder.
- A thin neck appeared? Stop rolling there and work the thicker parts.
- Slides without turning? There is free water on the bench. Sticks and stretches? Make the coil shorter.
A coil doesn’t have to be perfectly cylindrical. It just needs to be even enough to sit properly against the surface below. Roll a few coils at a time and keep the waiting ones covered; Simons notes that thin coils dry quickly.
Why does my coil crack when I bend it?
It may be a dry skin, clay that is too stiff or a coil too thin for that curve. Before using it, bend a section to match the curve of the pot’s outline where the coil will be placed: a coil that survives an open arc can crack on a tight curve. Compare it with a portion fresh from the bag. If the coil keeps cracking after you have restored suitable working conditions, remake it with clay in a more suitable condition instead of adding more water to the surface.
How long a coil do you need for one course?
For a circular course, L = π × Dm, where Dm is the diameter of the seated coil’s centerline, not the outside diameter of the piece. Example calculation: a band with a 100 mm outside diameter and an 8 mm wall gives Dm = 92 mm and a course of about 289 mm; using 100 mm would give about 314 mm. Leave some extra and trim in place, without stretching.
For height, do not divide the final height by the coil diameter as if they were bricks. If one blended band rose about 11 mm on your test ring and 33 mm remain, plan for approximately three more courses, checking the height after each one.
Step by step: from the base to the first course
- Make the base. Flatten a portion into a disk, working both faces while there is no wall yet, and cut the outline on the board.
- Seat the first coil on the edge of the disk, not hanging over it, so you can blend the inner margin into the floor and the outer one into the side of the base.
- Prepare the surfaces according to their condition (see the table below). If you score and use slip, the marks should stay visible and the coil should not slide in a puddle. This helps, but it does not replace fit and compression.
- Blend the coil into the base from the inside and outside. Support the joint with your other hand directly opposite the pressure you apply.
- Close the ends with diagonal cuts that fit together while keeping the cross-section of the rest of the coil. One end lying on top of the other becomes a lump.
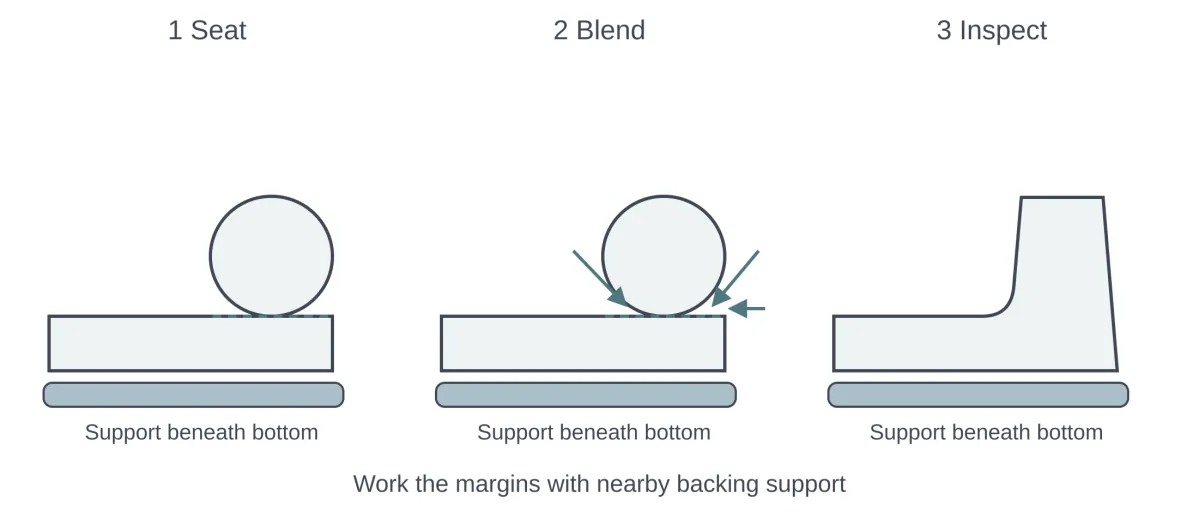
First coil on the base: seat, blend the margins with support underneath, check. Diagram from SenseCraft’s Ceramics by Hand (English edition); not to scale.
What if the end of the coil does not reach, or there is too much?
If it does not reach, make another segment; stretching it creates a thin spot. If there is extra, trim it. On the following courses, close the ends in different positions around the piece: this makes each end joint easier to follow, although it does not guarantee strength.
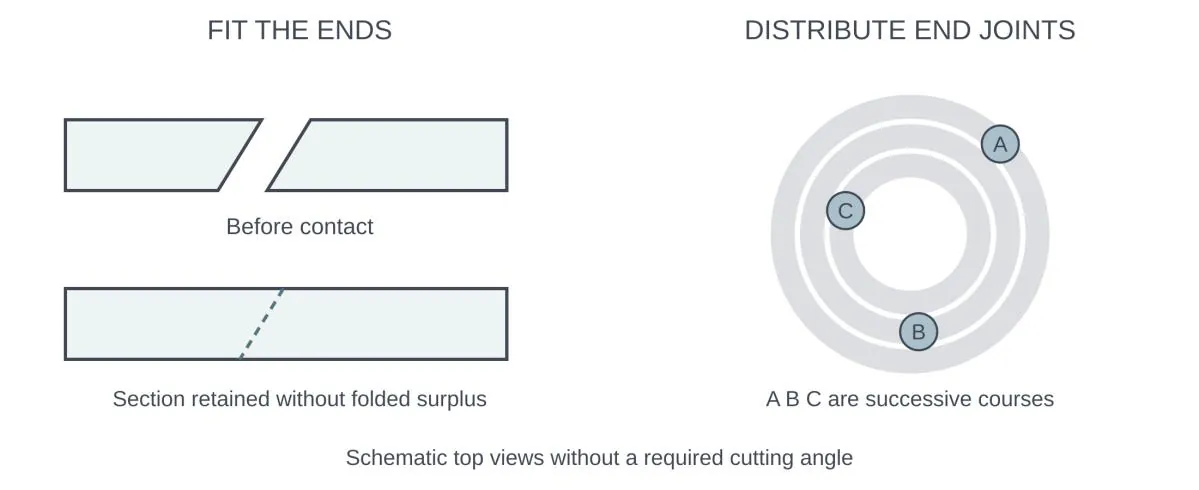
Complementary diagonal cuts at the ends, and end joints spread around the piece. Diagram from SenseCraft’s Ceramics by Hand (English edition); not to scale.
How to build the wall, course by course
- Check the previous course: profile, joint with the base and whether the wall holds its own weight.
- Seat the new coil in sections, without stretching it or letting the loose length pull on what is already in place.
- Blend the joint: with your thumb or a tool, drag small amounts of the new coil down into the wall below in short strokes that cross the line. Your other hand follows on the opposite side, right where you are working.
- Thin only as needed and compare thickness, height and profile all around.
- Inspect before covering it with the next course: gaps, folds, slipping, end joints.
- Decide: add another course only if the piece is still stable and you can still reach both sides.
- Finish the rim. When you reach the height you want, check that the last course is blended into the wall and even out the rim without thinning it too much: support it inside and outside, smooth small irregularities and round the top. Inspect the profile before starting controlled drying.
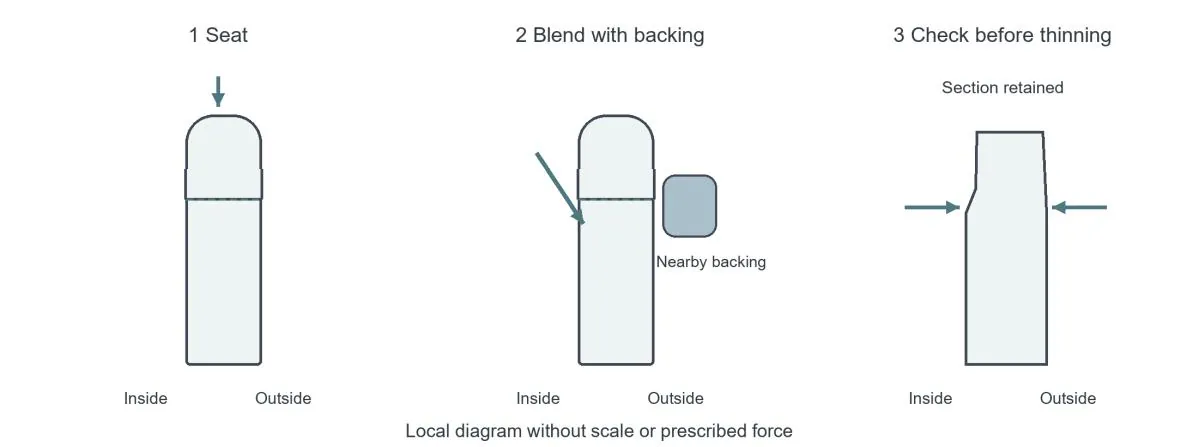
Seat, blend across the joint with support, and check before thinning. Diagram from SenseCraft’s Ceramics by Hand (English edition); not to scale.
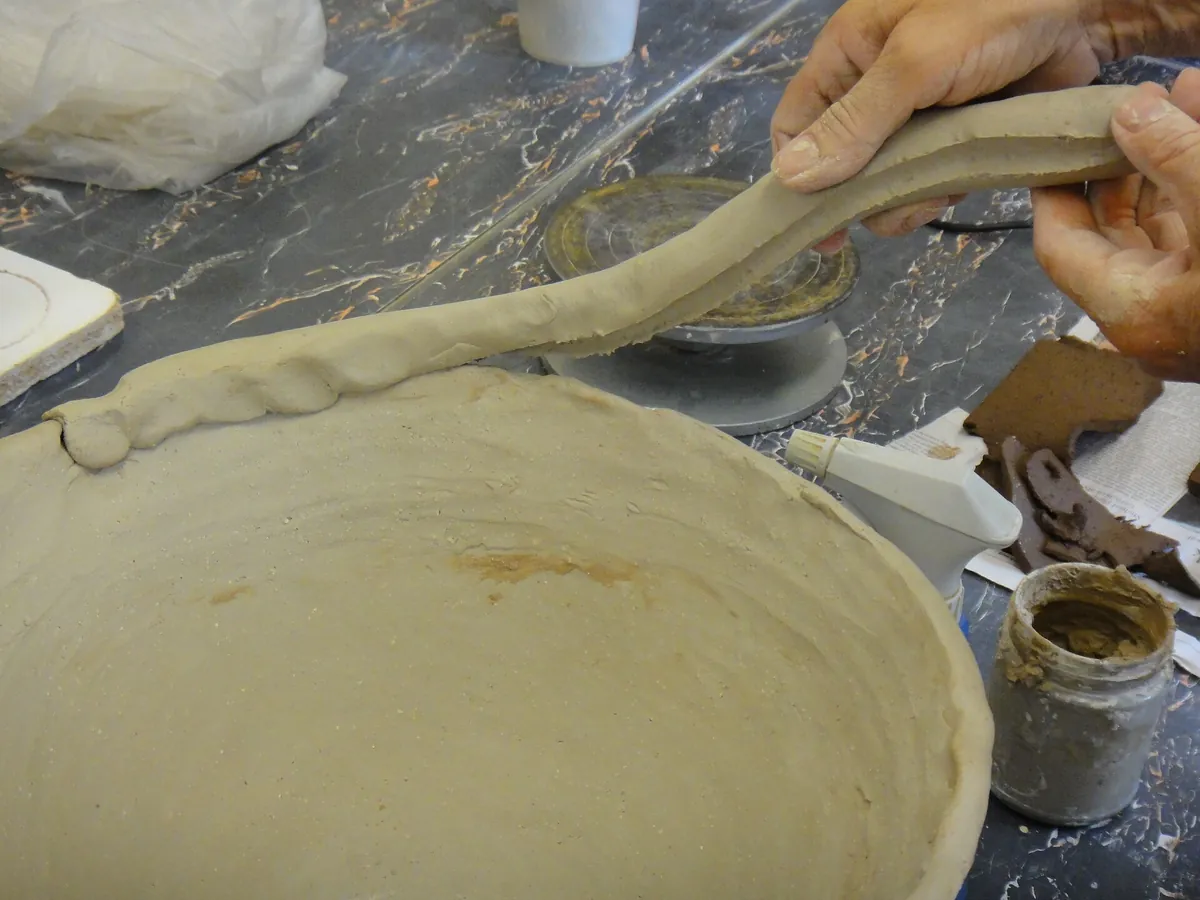
A coil being seated on the rim of a bowl under construction. Photo: Poupou l’quourouce, CC BY 3.0, via Wikimedia Commons; resized.

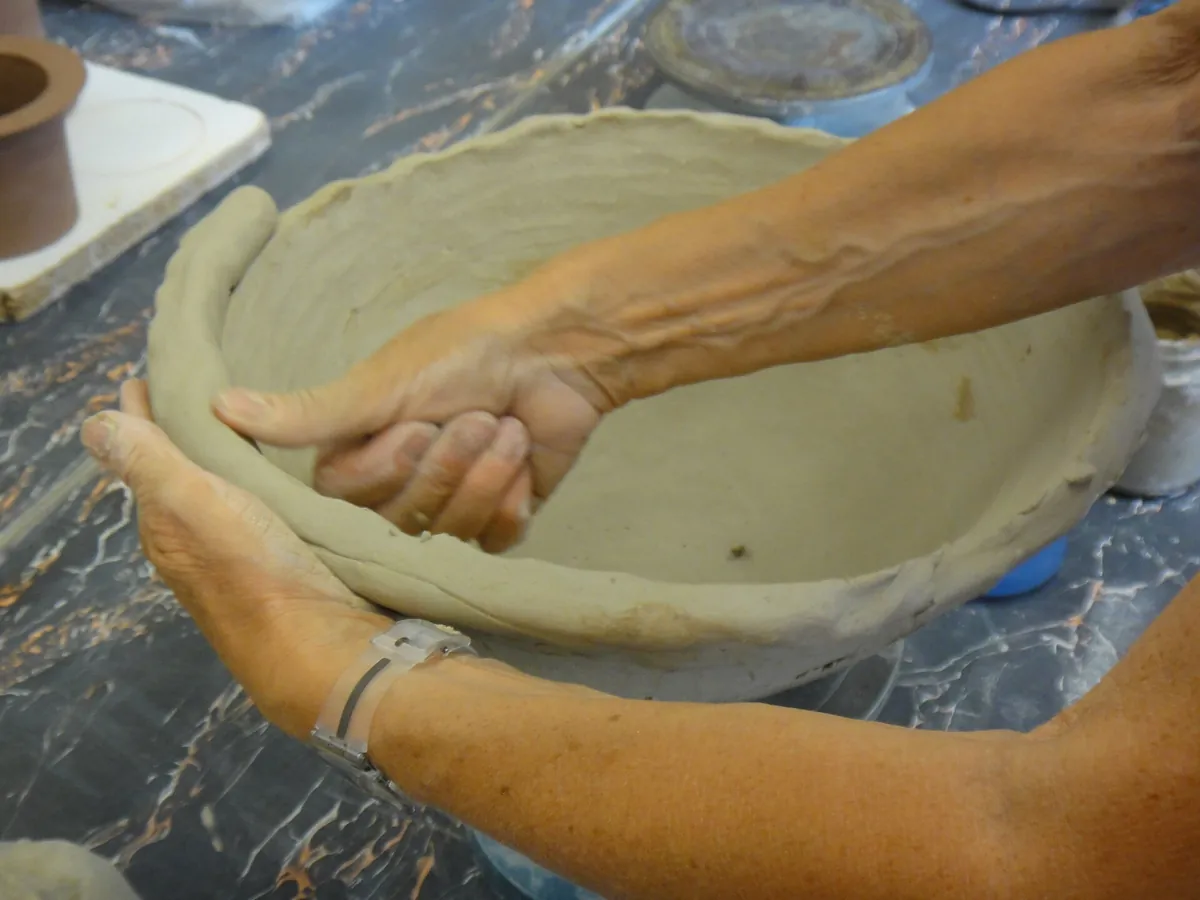
The thumb drags clay from the coil into the wall on the inside while the other hand supports the wall outside. Photo: Poupou l’quourouce, CC BY 3.0, via Wikimedia Commons; resized.

If you’ve only smeared a thin layer of clay over the seam, rework the actual contact between the coils. Smoothing the surface alone won’t fill a gap underneath.
How to join clay coils: do you need to score and slip every one?
The sources describe different procedures, which vary with the clay’s condition, the size of the coils and the way the joints are compressed. AMACO and Jessica Fong’s course text at the University of the Pacific teach scoring and slipping every coil. Simons skips this while the clay is wet, but scores the rim when she returns to a piece that has firmed up. Instead of picking one rule, test the joint on a sample with both surfaces in the same condition:
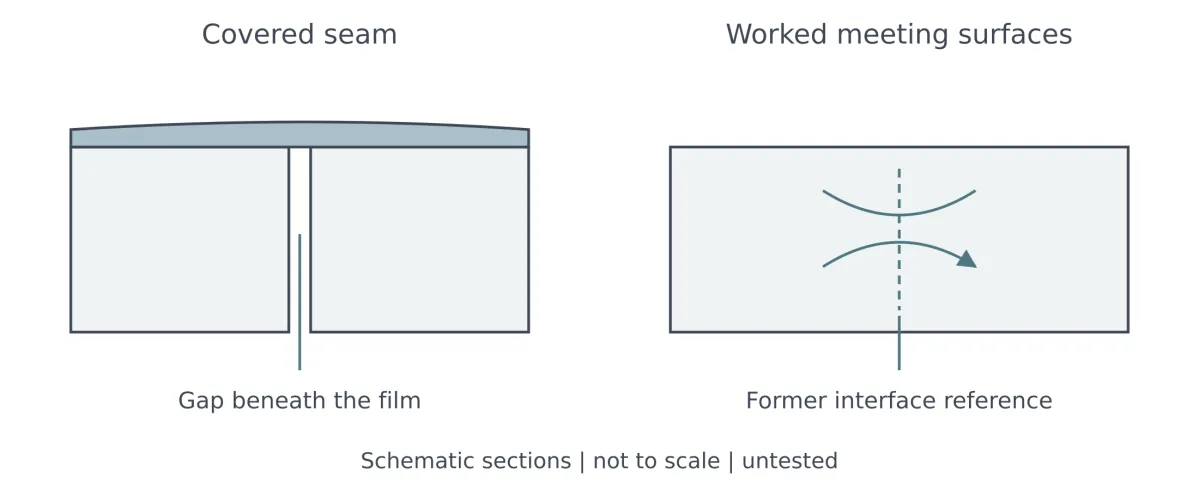
A film over the line can hide a gap; a worked joint crosses the old interface. Diagram from SenseCraft’s Ceramics by Hand (English edition); not to scale.
| Condition of both surfaces | What to test on a sample | Warning signs — stop and reassess |
|---|---|---|
| Wet, deformable and similar | Direct join with compression; scoring and slip remain an option | The line opens, a film only covers the joint, or the wall loses its shape |
| Firmer but still workable (resuming) | Adjust the contact, score both faces and use a little slip of the same clay | The surface softens but the core crumbles or separates |
| Very different, stiff or damaged | Adjust or remake the parts before joining | Cracking, the soft part gets crushed, or the firm part does not deform |
SenseCraft teaching table for comparing conditions; it does not say which joint is stronger.
How to widen and narrow the form without losing support
To widen, seat each coil slightly further out than the one below; to narrow, slightly further in. There is no fixed offset per course: the contact area and the support must remain sufficient. When widening, watch the lower wall, which can start to bulge while the top still looks fine. When narrowing, the course gets shorter: if Dm drops from 92 to 80 mm, the estimated length drops from about 289 to 251 mm. If you are using a coil prepared for the previous diameter, trim the extra as you seat it instead of folding it, or it will form pleats.
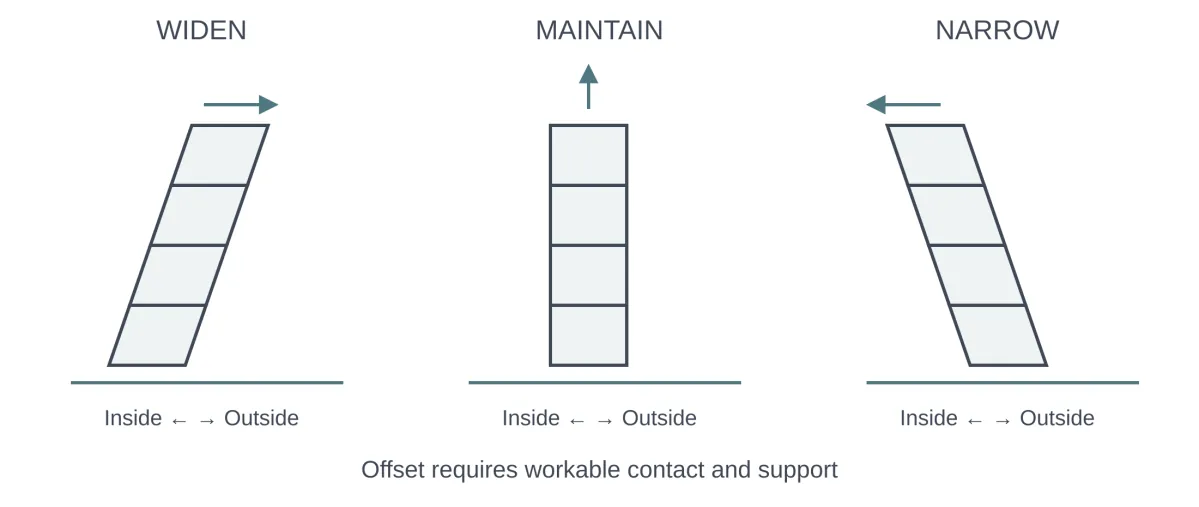
Widen, keep, narrow: each shift needs workable contact and support. Diagram from SenseCraft’s Ceramics by Hand (English edition); not to scale.
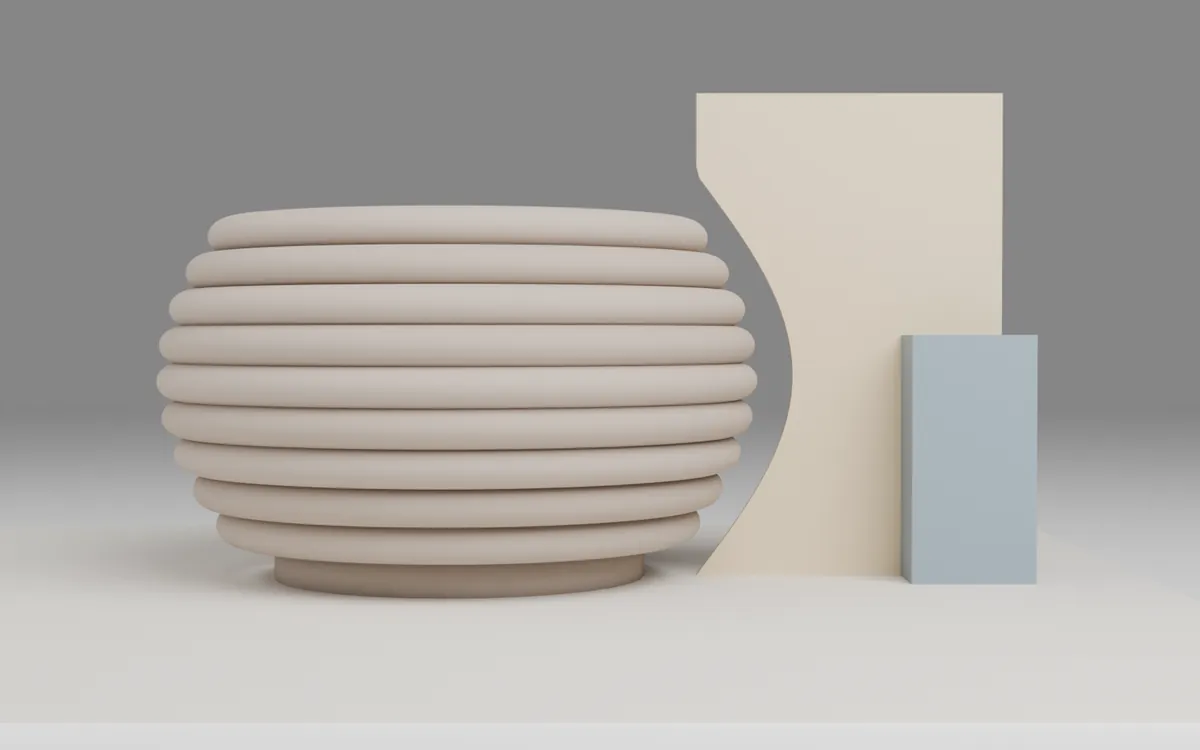
The cardboard template stays a visible distance from the wall: it is for comparing the profile, not for pushing the clay. Illustrative SenseCraft render with simulated clay; not to scale. The gap is illustrative, not a measured clearance.
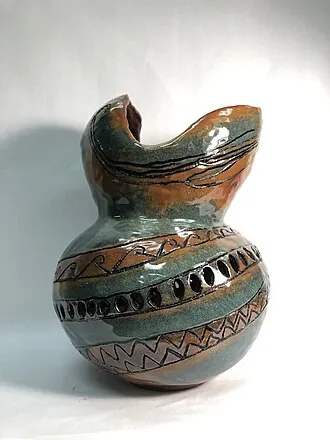
A coil-built piece that widens and then narrows to the neck. A photo of the finished piece shows neither wall thickness nor the building sequence. Photo: Odarpana, CC BY-SA 4.0, via Wikimedia Commons; resized and converted to WebP.

Build the shoulder over several courses and finish the joints your hand can still reach before narrowing the mouth. To check the profile, AMACO uses a cardboard template cut to the negative of the design and consulted often: it is for comparing, not for pushing the clay. Always look from the same point and from two directions.
Pausing and resuming without losing the piece
Stop when the lower wall bulges, the top leans, a joint opens or you lose access for your supporting hand. Karen Terpstra, who builds large jars with flat coils, lets the first courses firm up to leather hard before adding more weight and keeps the lower section wrapped in plastic. Her timings and scale belong to that method; the principle is that the base can gain firmness while the rim remains workable enough to join another coil.
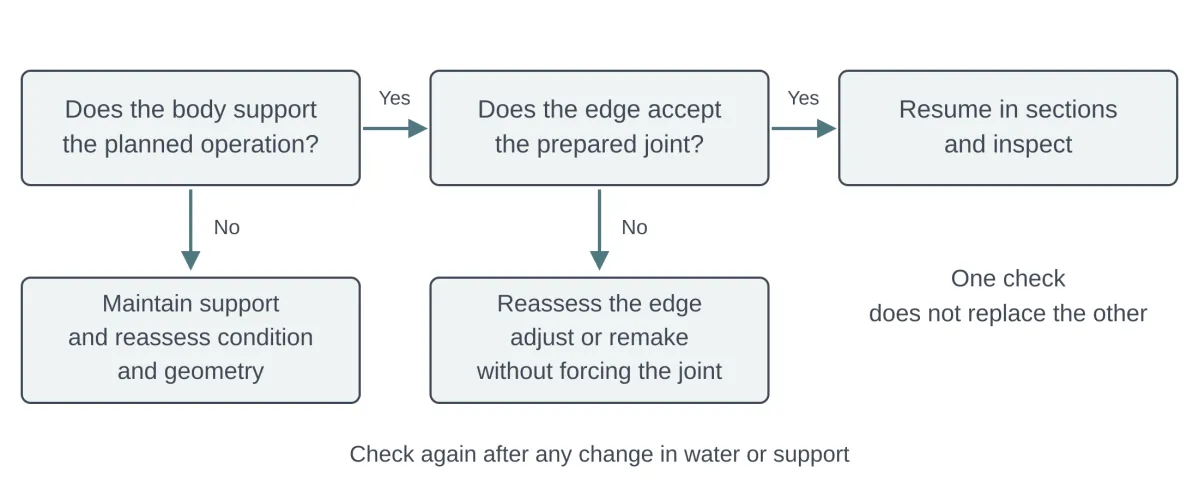
Two separate checks before resuming: support and whether the rim can still be joined. Diagram from SenseCraft’s Ceramics by Hand (English edition); not to scale.
Before a long pause, finish joining the last coil and protect the whole piece, including the rim, against uneven moisture loss. If the plastic could deform the mouth, hold it away with a support without leaving the rim exposed.
How do you resume a coil pot the next day?
There are two questions: can the wall take more weight? Will the rim still accept a join? Test the second one on a scrap kept in the same conditions instead of wetting the top of the piece. If the rim crumbles or only takes a soft film over a stiff interior, you may need to cut back to a workable region or finish the piece lower. A hair dryer, heat gun or direct sun can speed up surface drying and create moisture differences between the surface and the interior: a rim that looks firm does not mean the whole wall is equally firm.
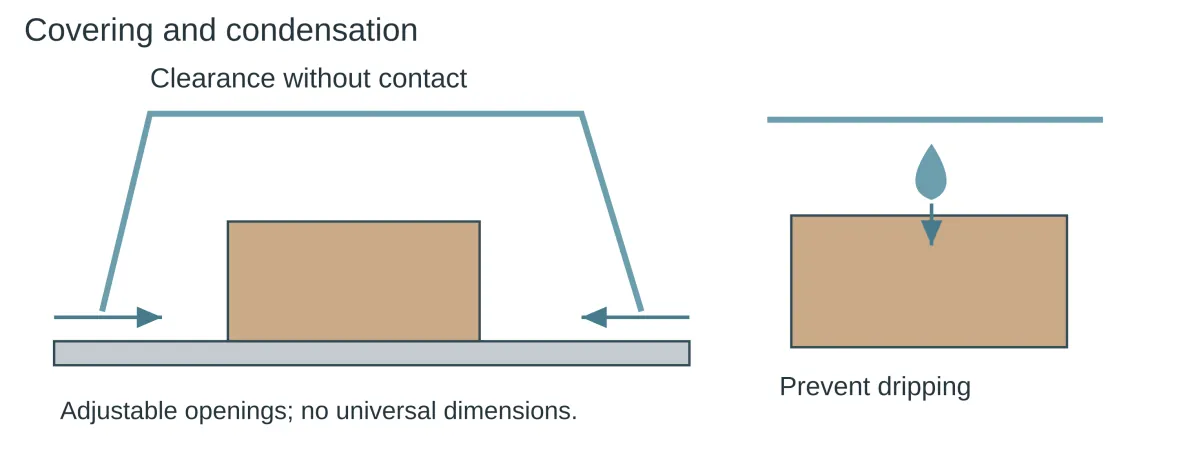
A cover that does not touch the piece, with adjustable openings; keep condensation from dripping onto it. Diagram from SenseCraft’s Ceramics by Hand (English edition); not to scale.
Visible coils or a smooth wall?
Either way, proper joining comes first. For a smooth wall, blend every joint and only then even out the surface, with strokes that cross the joints, without using water as your main tool. To keep the coils visible, still blend the courses properly, working mainly from the inside and keeping the outer texture without leaving open joints. Simons uses larger structural coils for the wall and thin detail coils on the outside; in that method, the outside appearance does not replace the join of the wall. Two cylinders that merely touch, with a deep groove between them, do not make a wall. A good-looking surface does not prove a continuous joint inside; to train your eye, cut a still-wet sample in half.
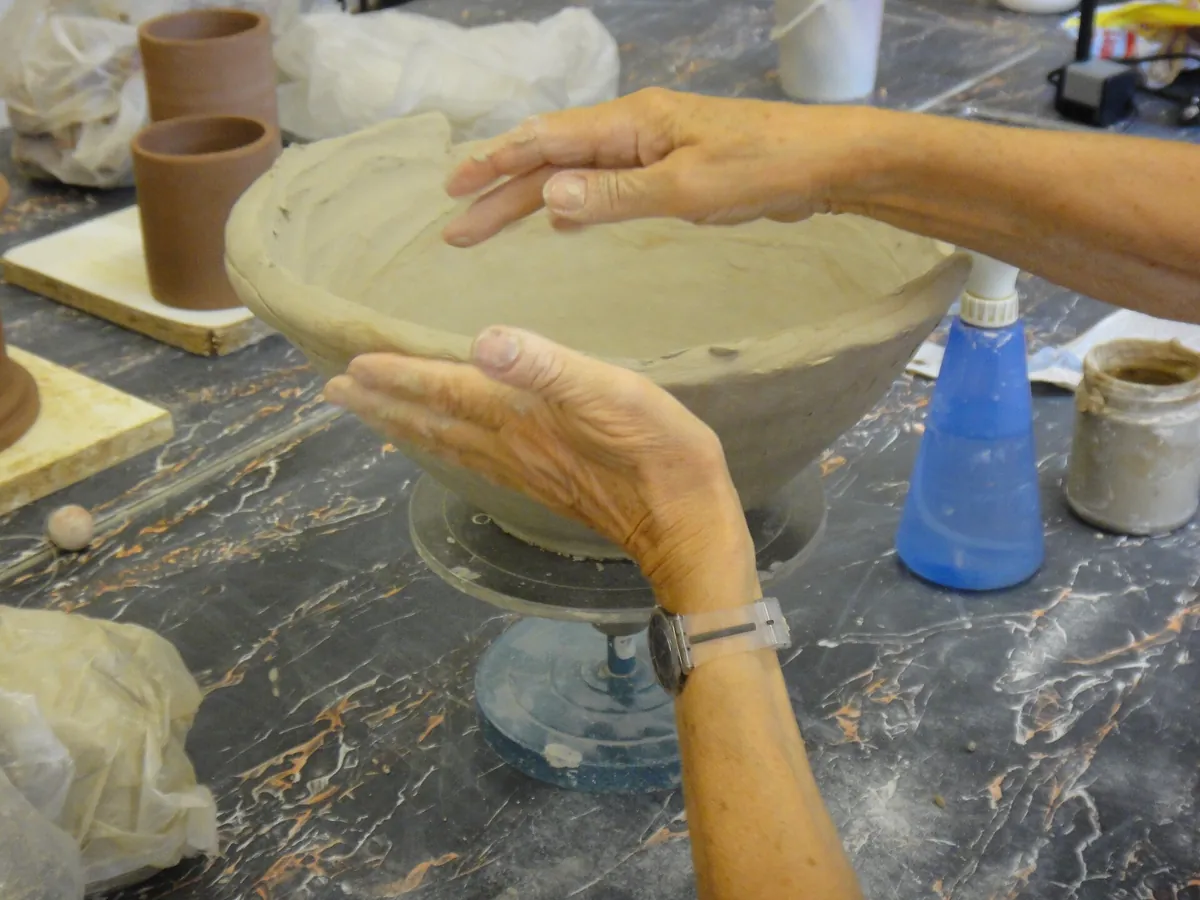
A coil-built bowl on a banding wheel, with a smoothed outer surface and hands working the joint along the rim. Photo: Poupou l’quourouce, CC BY 3.0, via Wikimedia Commons; resized.

Common problems and what to check
| Sign | What to check first |
|---|---|
| The course slips | Too much slip or water, or a big difference in condition; stop instead of stacking more |
| The end joint became a lump | Extra length or one end over the other; trim and redo |
| The wall opens or sags while joining | Supporting hand, contact area, accumulated weight and firmness of the base |
| A horizontal line keeps coming back | An unblended joint, handling or uneven drying; note when it appeared |
| The base separates from the wall | The first joint, the condition of both parts and how the piece dried |
Why does a coil pot crack while drying?
Cracks can appear when parts of the piece dry unevenly. Rims and more exposed areas can firm up before the base, depending on thickness, support and drying conditions. Tony Hansen of Digitalfire sums it up: at no point should one part of a piece be far ahead of another. Protect areas that are drying faster than the rest, for example by covering them, and avoid direct drafts. Rubbing slip only over the surface of a crack does not guarantee a repair: before touching it, find out whether the cause was a poorly blended joint or uneven drying.
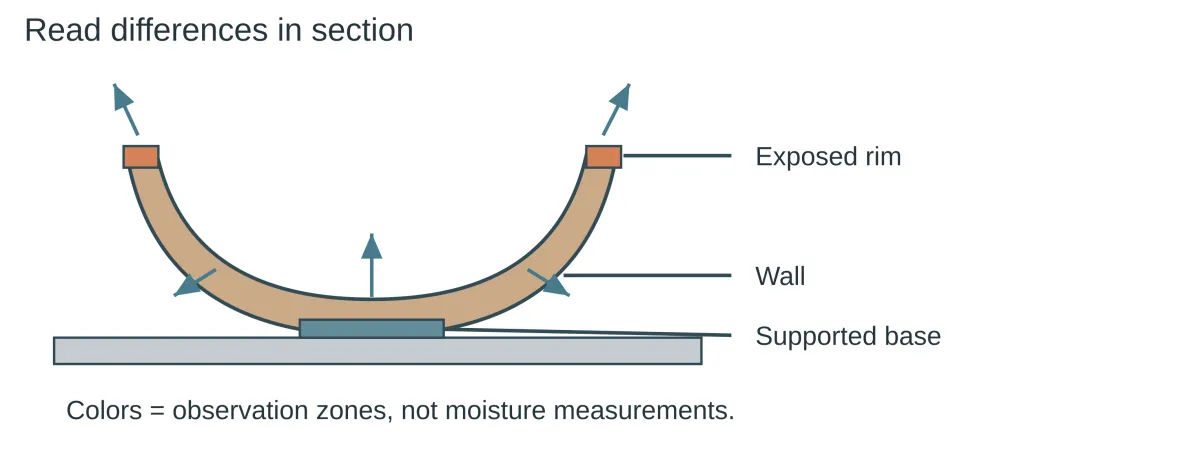
The exposed rim, wall and supported base may dry at different rates. Colors identify areas to monitor, not measured moisture levels. Diagram from SenseCraft’s Ceramics by Hand (English edition); not to scale.
Does air trapped between coils make a piece explode in the kiln?
Not the air itself. Sue McLeod explains in Ceramics Monthly that what causes an explosion is the water still in the clay; an enclosed void is a problem because it can hold moisture. Before sending the piece for firing, confirm the clay body, wall thickness, and drying requirements with the kiln operator.
Safety and hand care
Pick up scraps before they dry and clean with a damp cloth; do not sweep, blow or sand dry clay. The University of Utah’s safety guidance treats silica dust as an inhalation hazard and recommends daily wet cleaning and frequent breaks for hands and wrists. When cutting coil ends, keep your hand out of the tool’s path and turn the board instead of twisting your wrist.
Where this content comes from
This article summarizes chapter 7 of Ceramics by Hand — Foundations and Techniques Without a Wheel, a literature-based guide compiled by SenseCraft. It combines practices documented in the sources cited below with teaching structure, tables, a diagram and exercise and calculation proposals developed by SenseCraft. The writing was assisted by AI tools and edited by SenseCraft. To see coil building alongside the other techniques, go back to the guide to pottery without a wheel.
Sources cited
- AMACO Brent. Amphora Project: Heroes and Handbuilding, lesson plan.
- Jessica Fong, University of the Pacific. Coil Construction: Pottery and Sculpture, Humanities LibreTexts, section 4.2.
- Tony Hansen. Drying Ceramics Without Cracks, Digitalfire.
- Sue McLeod. Techno File: Air Bubble Myth, Ceramics Monthly, 2021.
- Amy Simons. Why Use Coils?, Pottery Making Illustrated, 2017.
- Karen Terpstra. How to Make a Coil Pot: Using Flat Coils to Construct Large Jars, Ceramic Arts Network.
- University of Utah, Environmental Health and Safety. Arts Safety: Ceramics.
Limits
- This article summarizes published sources; it is not the result of SenseCraft testing. The practices cited belong to the authors and institutions named.
- The piece dimensions and the numbers in the examples are practice targets and illustrative calculations for wet clay; they are not minimum thicknesses, dry or fired dimensions, or values that apply to every clay body.
- A smooth wall, invisible joints and a form that holds up do not prove a sound internal joint, strength, watertightness or that a piece is safe for food contact.
Basis: literature review — original article based on the October 2026 Portuguese edition of the SenseCraft handbuilding book, chapter 7. The corresponding material is also available in English in Ceramics by Hand — Foundations and Techniques Without a Wheel (November 2026 edition), with primary sources listed at the end.