
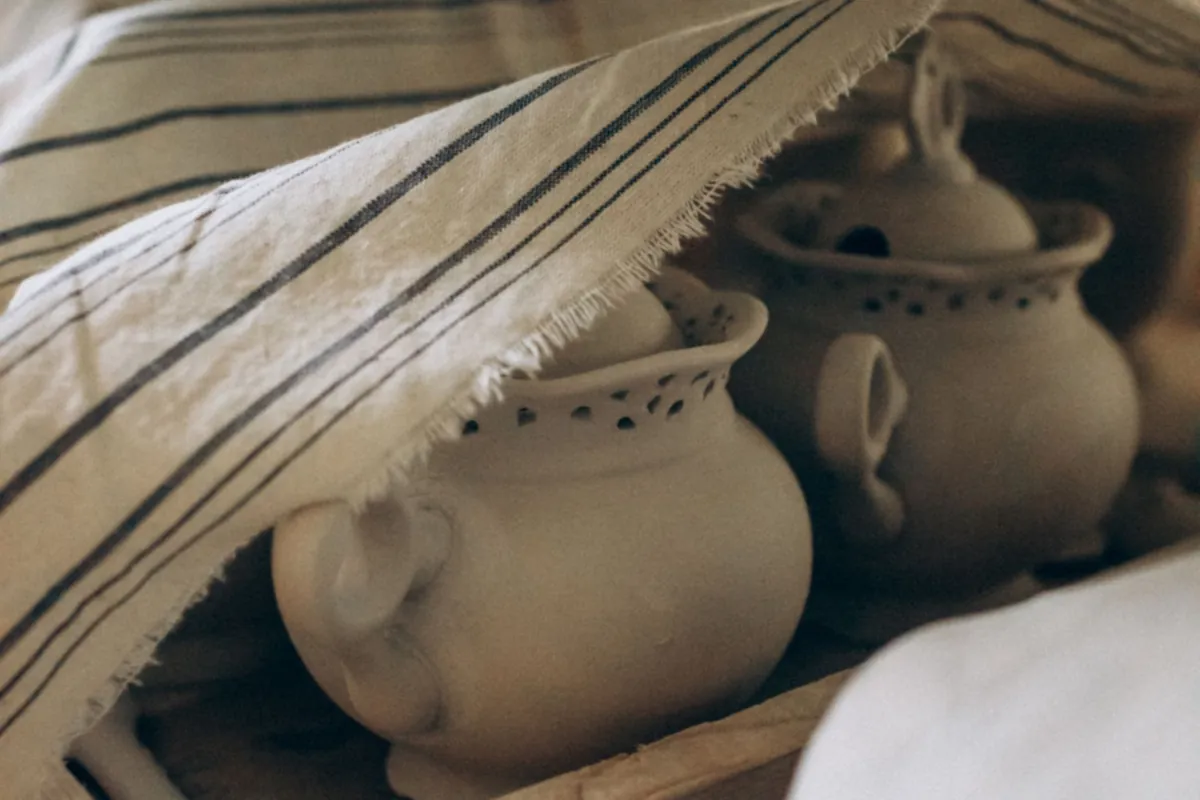
To dry pottery without cracking (here, clay pieces that will be fired in a ceramic kiln), the aim is for the whole piece to lose water at a similar pace: protect the parts that dry first (rims, handles, thin details), keep continuous support under the parts that are still soft, and increase exposure gradually while you watch how the piece responds. Drying cracks almost always start from a difference: one region shrinks before its neighbor and the two pull on each other. Drying slowly helps; drying evenly is what matters.
This article covers the stage after forming and before firing, for any technique in the guide to pottery without a wheel. If you work with slabs, it picks up where how to roll out a clay slab leaves off, with the slab already labeled and supported.
Why pottery cracks while drying
Unfired clay shrinks as it loses water. If the rim of a bowl is exposed to the air and the base is hidden by the ware board, the rim dries and shrinks first. The difference in shrinkage between rim and base creates stresses. The piece may warp to accommodate them; if the tensile stress exceeds the strength of the unfired clay, it may crack. Dave Finkelnburg, in Ceramics Monthly, links this uneven drying both to the S-crack in the base of plates and to the crack that starts at the rim.
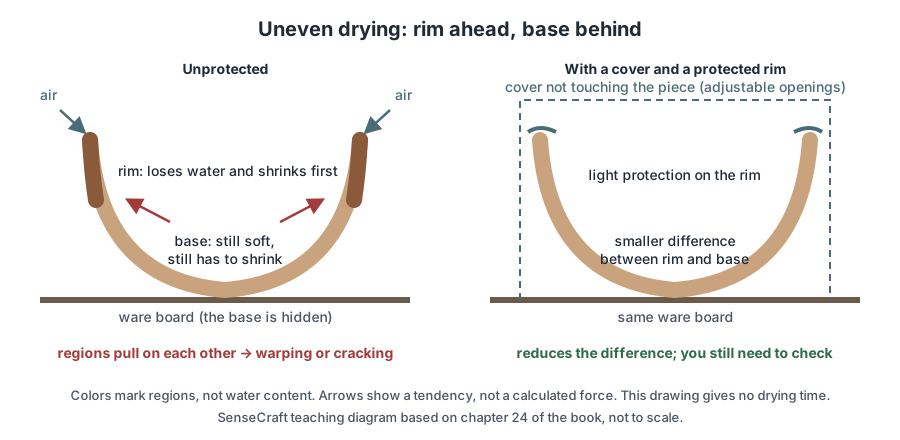
SenseCraft teaching diagram based on the sources cited, not to scale. Colors mark regions, not the amount of water.
Digitalfire, by Tony Hansen, puts the idea plainly: the problem is uneven drying, not fast drying as such. The same source notes that adding grog is not the main remedy: a smooth clay body usually dries without cracking when the piece dries evenly. Digitalfire’s comparative DFAC test does this on purpose: it covers the center of a clay disk while the edge dries, and the crack that appears is used to compare clay bodies with each other, not to predict how a given piece will behave.
Not every crack comes from drying: a poorly made joint, a tool mark or earlier deformation can also open lines that drying only reveals.
Is a stiff piece already dry?
Not necessarily. A piece can stop visibly shrinking and still hold water inside. Stiffness and a stable size do not show what is happening inside. Finkelnburg also points out that drying cracks are not always easy to see in greenware; some only show up after firing.
Before drying: map the piece
“Dry it slowly” tells you little. It is more useful to look at the piece in section and mark:
- where the wall is thicker and where it is thinner (base, slab joins, handle attachment points);
- what is exposed to the air and what is hidden (base on the board, inside of a narrow neck);
- joins and attached parts;
- where water was added during finishing and where the slab was bent.
With that map, the question becomes concrete: which region is ahead and which is behind? Record thicknesses as “measured”, “estimated” or “not accessible”. Do not pierce the piece to measure it.
Where to leave the piece to dry
A stable shelf, out of the way, away from direct sun, fans, air-conditioning vents and local heat. The kiln is not a makeshift dryer. A thermo-hygrometer near the shelf helps you record the conditions, but it does not measure the water inside the clay. A piece by the window and a piece at the back of the rack are not in the same environment; if you move one, move the whole board and write it down.
To clean the work area, use a damp cloth or mop; do not sweep or blow clay dust. Princeton University’s safety guidance recommends finishing greenware while it is still damp, with a sponge, instead of sanding dry clay, because of silica dust.
How to cover pottery so it dries slowly
A cover reduces water exchange with the air. A tightly closed box tends to preserve the piece’s current state; openings let drying continue. A plastic tent over a frame, not touching the piece, lets you adjust those openings.
Use these three levels of coverage, without assigning fixed drying times:
- Broad coverage, to help even out moisture levels across the piece.
- Limited opening, to start or continue water loss.
- More exposure, when the piece responds well.
Record the actual opening. “Half open” helps no one repeat it; “tent lifted off the board on two opposite sides”, with a photo, does.
The plastic drips on the piece: now what?
Condensation drops on a rim or a join wet the clay in one spot. Look before you lift the cover and remove the plastic without letting the drops fall. If condensation keeps forming, review the position, the contact and the openings.
In a humid climate, covering can backfire
Sunshine Cobb, in Pottery Making Illustrated, reports that in a very humid environment a piece covered with plastic can end up damper than when it was wrapped. “Brazilian climate” does not describe a single condition: what works in a dry winter does not work in the rainy season. Record temperature and humidity near the pieces and adjust the cover while monitoring the piece, without resorting to strong drafts or heat.
Does spraying water fix a crack?
Not reliably. Wetting the surface does not undo a crack or return the whole piece to an earlier state. If the difference is already large, stop speeding things up, protect the piece and reassess. For a small piece, remaking it is often the more controllable decision.
Support also decides whether the piece cracks
The support has to hold the piece without stopping it from shrinking. Paper, cloth, wood, porous material and plastic are not interchangeable: they can mark, stick, hold water or draw water out in different ways. Test the combination on an offcut before using it on an important piece.
- A grid under a soft piece can leave marks and sags; small contact points concentrate the load.
- A weight on a slab can restrain shrinkage and crush details; it is not a universal fix for warping.
- A rigid mold or support inside the piece traps a piece that is shrinking. On a hump mold (the clay on the outside), take the piece off in time, when the form holds itself up and still releases. On a slump mold, the tendency to pull away does not guarantee release: undercuts and sticking can still hold it.
If the form sticks, stop: do not twist it or pull one side.
When to flip the piece (and when not to)
Turning the board, moving the piece to another support and flipping it rim-down are different actions. None has a required frequency. Do it only when the gain in exposure outweighs the risk of handling.
Finkelnburg describes inverting a piece with its rim on the table as a way to slow the drying of the rim and speed up the drying of the foot. Before you flip, check:
| Question | If the answer is “no” |
|---|---|
| Can the walls be held with distributed contact, without denting? | Wait; adjust the cover instead of flipping |
| Is the rim flat and firm enough to take the weight without marking or going oval? | Keep the original position |
| Is the receiving board clean, flat and clear where the handle will be? | Prepare another receiving board first |
| Does the piece release from its current support without dragging? | Do not force it; review the support |
| Can you make a single controlled turn, close to the bench? | Do not improvise a flip on your own |
SenseCraft checklist based on the sources cited. It organizes the decision; it does not measure strength.
After flipping, check the face that was hidden, the joins and the outline. If the piece has deformed, do not flip it again to try to compensate.
Handles, lids and hollow forms
Handle. When it is thinner or more exposed than the body, it can dry and shrink before the body, creating stresses at the joins. Finkelnburg mentions covering rims and handles with strips of cloth or plastic; the kiln maker Skutt also recommends keeping thin parts more fully covered to give thicker areas time to dry. Local protection on the handle should not squeeze it or pull on its attachment points; it is different from the general cover, which can enclose the whole piece, with openings adjusted as each region dries. Never lift unfired ware by the handle.
Lid. Label the lid and body as a pair. The lid exposes two faces and dries differently; resting it in the gallery can restrain shrinkage. Check the fit without forcing it.
Hollow form. A small opening does not show that the inside of a thick wall has dried. Record the thicknesses you cannot measure.
Decision cycle: observe, change one thing, check
- Observe the rim, base, joins, outline and support, comparing with the previous record. Do not keep touching a fragile rim to “feel” how hard it is.
- Change one thing only: open the cover a little, protect one spot, expose a previously covered surface, or leave it as is.
- Check the response before leaving the piece unsupervised.
- Decide: move on if the form is stable; keep or reduce exposure if the difference in drying between regions has grown; stop if a join is opening, deformation is progressing or a support is stuck.
| What you see | First action | What to check next |
|---|---|---|
| Firm rim, base still deformable | Protect the rim, keep the support | Whether the base keeps up without losing shape |
| Drops on details | Remove the cover without dripping; fix the setup | Marks or local softening |
| Support stuck to the piece | Stop pulling | How to release it without force, and the piece’s state |
| Join opening | Separate it from sound pieces and record it | Whether it is worth investigating or remaking |
SenseCraft decision table: it is a first response, not a diagnosis. If the problem keeps coming back, go back to the form and the join; stretching out the drying may only hide problems with the way the piece was formed or joined.
Does weighing the piece help? How to record without fooling yourself
A scale helps you follow the change in mass. Keep the same configuration and record the resolution and the times. If you weigh it on the board, remember the board can also gain or lose water: record the mass of the whole set, without treating the change as loss from the piece alone. Do not take the piece off its support if that could deform it. Hypothetical example, scale with 0.1 g resolution, piece weighed without support: 850.0 g, 828.4 g, 815.2 g and 815.1 g. The total loss is 34.9 g, about 4.1% of the initial mass. That does not tell you how much water is left, because the dry reference mass was not determined.
If two readings in a row give the same value, write “no difference indicated at 0.1 g resolution”, not “dry” or “ready for the kiln”. A change the size of the resolution may just be noise from the scale or the way the piece sits: check whether the reading settles before you interpret that small change.
When comparing measurements, always keep the states apart: wet (WET), air-dry (DRY) and fired (FIRED). Two marks 200.0 mm apart in wet clay that end up 190.0 mm apart after drying indicate 5.0% drying shrinkage in that piece. That is not a recommended clearance for any support: a rigid support can grip the piece long before that point.
Does the cheek test work?
The tip of holding the piece to your cheek to feel whether it is cold appears in studio guidance, including from the kiln maker Skutt: a cold piece still holds water. A cool feel may indicate remaining moisture; the absence of that sensation does not prove that the piece is dry throughout. Follow the kiln operator’s procedure, and do not use the cheek test alone to decide whether the piece is ready to fire.
What to hand over to whoever fires it
Send the piece with a record of the clay body used, thicknesses (measured and estimated), joins, supports removed, last application of water, engobe or glaze, damage and drying conditions. Elapsed time is information, not proof; the final word belongs to whoever knows the kiln and the load.
Quick questions
How long does pottery take to dry? It depends on thickness, shape, clay body, support and environment. That is why this article gives no number: follow the piece and keep a record.
Can I leave a piece to dry in the mold? Only while the mold does not restrain shrinkage. A hump mold, inside the piece, has to come out as soon as the form holds itself up; see support also decides whether the piece cracks.
Can I dry pottery in the sun or with a hair dryer? Local heat and direct sun can increase the difference in drying between regions and, with it, the risk of cracks. Cobb recommends not heating thin pieces or pieces prone to cracking.
Where this content comes from
This article summarizes chapter 24 of Ceramics by Hand — Foundations and Techniques Without a Wheel, a literature-based guide compiled by SenseCraft. It combines practices documented in the sources cited below with teaching structure, tables, a checklist, a diagram and worked examples developed by SenseCraft. The writing was assisted by AI tools and edited by SenseCraft. To see drying alongside the other techniques, go back to the guide to pottery without a wheel.
Sources cited
- Sunshine Cobb. In the Studio: Managing the Drying Process, Pottery Making Illustrated, May/June 2020.
- Dave Finkelnburg. Techno File: Drying 101, Ceramics Monthly, December 2015.
- Tony Hansen, Digitalfire. Cracking of Clays During Drying and Drying Factor (DFAC), a comparative drying test.
- Princeton University, Environmental Health and Safety. Ceramics, safety guidance.
- Skutt. Ceramics 101, Drying section.
Limits
- This article summarizes published sources; it is not the result of SenseCraft testing. The practices cited belong to the authors, manufacturers and institutions named.
- No drying time, feel, color or sequence of weighings described here shows that a piece is ready to fire; that judgment depends on the clay body, the geometry, the history and the procedure of whoever runs the kiln.
- The weighing figures and the shrinkage calculation are hypothetical examples of the reasoning; they are not targets or values for any clay body.
- A dry piece with no visible cracks does not prove strength, freedom from defects in the firing or that the piece is safe for food contact.
Basis: literature review — original article based on the October 2026 Portuguese edition of the SenseCraft handbuilding book, chapter 24. The corresponding material is also available in English in Ceramics by Hand — Foundations and Techniques Without a Wheel (November 2026 edition), with primary sources listed at the end.