
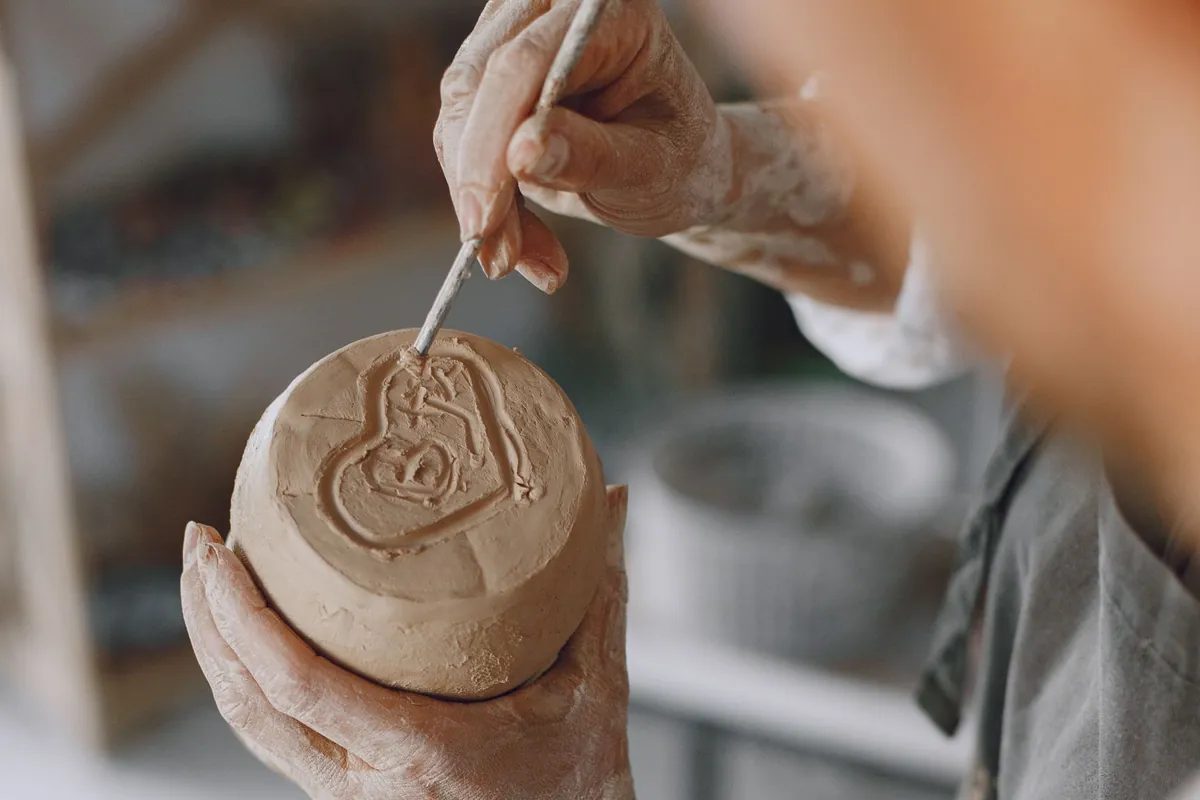
Leather-hard is the stage at which clay has firmed up enough to retain its basic shape while still allowing certain tasks: cutting, joining, scraping, minor adjustments. It is not a moment or a water percentage: it is a range running from soft to stiff leather-hard, and each operation has its own window within it. So the useful question is not “is it leather-hard yet?” but “can this area take this action, on this support?”
Almost every technique in the guide to pottery without a wheel depends on this reading: the clay slab about to be curved, the part that will be joined to another, the bowl that needs to come off the mold before it grips. This article shows how to recognize the state and choose the operation; drying the piece completely is covered in how to dry pottery without cracking.
What leather-hard means (and why “it’s ready” misleads)
Plastic, leather-hard and dry are names for stretches of one continuous change. Tony Hansen, in the Digitalfire glossary, describes leather-hard as the stage between soft plastic and dry, when the clay has stiffened enough to support its shape, and splits it into soft, medium and stiff, with differences in flexibility and handling. He also notes that each clay reaches this stage at its own rate and with its own strength and flexibility.
The name helps people talk; checking is what decides. “Firm enough to cut, supported on the board” says more than “leather-hard”. Always state which area you looked at, with which action and on which support.
| State, described by function | What to look for in that area | What still needs checking |
|---|---|---|
| Plastic | Deforms cohesively and keeps the change | Whether it holds its shape, sticks, or has a limit to the curve |
| Soft leather-hard | Holds part of its shape and still accepts some changes | Whether it sags when moved; what the inside is like |
| Medium or stiff leather-hard | Holds its shape better during handling; may allow controlled cutting or scraping | Brittleness, cracks, tool response, compatibility for joining |
| Apparently dry | Stiffer surface, sometimes lighter in color, barely deforms | The state of the core and the water still left |
SenseCraft table based on chapter 3 of the book. The rows describe functions, not water contents; different clays do not pass through identical ranges.
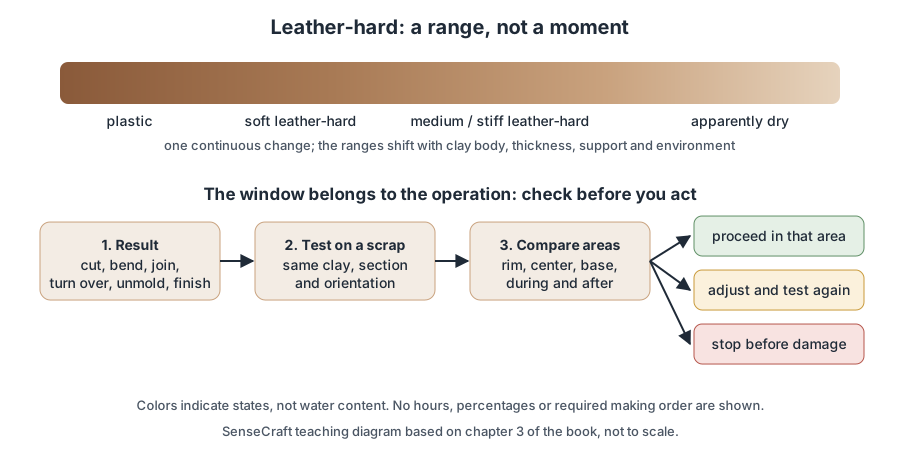
SenseCraft teaching diagram based on chapter 3 of the book Ceramics by Hand, not to scale. There are no hours or percentages in the drawing.
Does leather-hard clay have a set water percentage?
No percentage works for every clay. In a study published in Materials Research, Andrade, Al-Qureshi and Hotza measured the plasticity of three clays and found a correlation between effective compressive stress and moisture only within each clay. The study is about plasticity and does not define leather-hard. It supports comparing a clay body with itself under similar conditions; it does not allow carrying a number from one product to another.
There is also the trap of the calculation basis. In a fictional example, a sample with 80 g of solids and 20 g of water has 20% water on a wet basis (water divided by total mass) and 25% on a dry basis (water divided by solids). The water is the same; the denominator changed. So “add 5% water” means nothing until someone says 5% of what.
What is the difference between leather-hard and dry clay?
At leather-hard, the piece still allows certain tool operations. At soft leather-hard, it may accept small changes of shape; as it stiffens, its ability to deform without cracking drops. On an apparently dry piece, scraping tends to chip or raise dust. But “looks dry” is not the same as dry inside: an even color or a surface that no longer feels cool does not show that the water is gone. “Bone dry” varies between studios and does not mean a measured zero water content.
How to tell if clay is leather-hard
Start with what does not harm the piece. Confirm the clay body and its history, look at the piece in good light, and compare rim, center, base, the exposed face and the face on the support. Then move to a light touch, a controlled mark on a scrap and a small trial of the operation. No action should damage the piece to prove it is ready.
For that, keep scraps of the same clay, with the same preparation, the same thickness and similar exposure. A thin strip left on the table does not represent the core of a thick base; if the sample differs, note the difference and narrow your conclusion.
| Signal | Helps compare | Why it misleads |
|---|---|---|
| Color and sheen | Surface change in the same clay, under the same light | Pigment, salts, lighting and burnishing change color; it does not measure water |
| Coolness to the touch | Differences between areas under similar conditions | Depends on the temperature of the room, your hand and the support |
| Indentation from gentle finger pressure | Local resistance to a similar action | Finger force and contact area vary; it is not calibrated pressure |
| Bending a strip | How far that section bends without cracking | Geometry, speed and flaws interfere; one strip does not speak for a whole slab |
| Firmness when lifting | Response with that support and that weight | Span, grip and thickness change everything; it does not predict other moves |
SenseCraft table based on chapter 3 of the book. Each signal compares; none measures water content.
Also watch what happens after the action. A curve that looks sound when released can sag again or show a line moments later.
Firm outside, soft inside: surface and core
The surface exchanges water with the air and the support; the inside has to move water out to the surface. A firm skin can hide a soft center. A face on plaster or wood loses water differently from a face on plastic. Rims, raised details and thin parts tend to firm up before a thick area, depending on exposure and covering.
If you are unsure about the interior, cut open a companion sample, not the piece. A section shows only that plane at that moment: if it reveals a layer or a difference in resistance, write it down before reworking the sample; if it reveals nothing, that does not rule out every flaw.
How long does clay take to reach leather-hard?
No time applies to every piece. Clay body, thickness, support, humidity, drafts and covering change the pace, and areas of the same piece get there at different times. D. Finkelnburg, a potter and engineer, explains in Ceramics Monthly that light covers slow drying and give water time to migrate from thick to thin parts, and that rims and handles can be covered so they keep pace with the base. Covering does not guarantee evenness: check for condensation and areas still exposed.
How do you keep clay leather-hard between sessions?
Cover the piece without letting the cover touch fragile details, and at the next session check the areas that firm up first, such as rims and handles. Sunshine Cobb, in Pottery Making Illustrated, notes that in very humid weather plastic can leave the piece wetter than when it was covered, and recommends a damp box for rehydrating work or keeping it moist in a dry studio. More in how to dry pottery without cracking.
Can I speed it up with a hair dryer or the sun?
Avoid direct sun, hair dryers and hot-air guns as a shortcut to firming the piece: they can create a moisture difference between the surface and the inside, and a firm surface on its own does not confirm the piece can take the operation. Some potters use heat in a controlled way: Cobb describes careful use of a torch to firm the foundation early in a build, keeping the piece moving, letting it rest so moisture can even out, and not heating seams, areas that will receive an attachment, or thin forms. In thin kaolin plates, Itaya and colleagues observed more warping when drying happened through one face than through both: a clue about uneven exposure, not a studio schedule.
What to do at leather-hard: each operation has its own window
A slab can accept a curve and still not survive being turned over. The routine is the same for every operation: define the result, prepare the tool, the support that will receive the piece and a place for trimmings, try the action on a scrap or a test area, compare the critical areas, not just the easiest one, and watch during and after. If distortion, a crack, sticking or unexpected resistance appears, stop before the damage spreads. The fix may be changing the support, the tool, the geometry or the state; adding water is not an automatic answer.
A successful test applies only to the operation and conditions tested: a strip that took a curve does not show that a larger slab can be inverted.
Cutting
A well-supported slab can be cut while still plastic; more precise cuts usually call for more firmness. Test on a scrap of the same thickness and see whether the blade goes in and out without dragging the outline or tearing the edge; check the underside and corners. If the clay drags, check cleanliness, support and technique before blaming the water. If it crumbles or chips, it may be too stiff for that tool. Never cut toward your own hand.
Bending
Bending needs enough deformability and a support that spreads the action. Bend a strip of the same thickness with the same face outward, and look at the face that stretches, the edges and the inside that may wrinkle. A gentle curve does not test a tighter one. Stop if you see a fine crack, hear a cracking sound or feel increasing resistance. Margaret Bohls, documenting a teapot made from soft slabs, lets the slabs stiffen until they are about halfway between wet and leather-hard, and cuts other parts from softer or stiffer slabs depending on their role: that is her process choice, not a universal scale.
Joining
Compare the state of the two areas that will meet; similar color does not prove a similar state. Bohls recommends having the parts at soft leather-hard and warns, especially with porcelain, against joining soft clay to stiff clay. If one part soaks up water instantly and the other slumps, stop: it is easier to even out the separate parts or remake one than to drench a finished joint. The step-by-step is in how to join clay using the score-and-slip method.
Turning over and changing supports
Moving the piece on a rigid board may be possible well before you can lift it by hand. Before turning it over, check that the base releases without pulling on the rim, and plan where your hands and the receiving support will carry the weight throughout the move. A firm rim does not mean a soft base can withstand turning the piece over. Never test strength by lifting the piece by a freshly attached handle.
Taking it off the mold or support
The piece shrinks as it firms up. On a convex (hump) mold, with the piece over the outside, this shrinkage can make it grip the mold; so know the way out before you form it, and remove it when it holds itself up and still comes off freely. If it has started to grip, waiting will not help: shrinkage tightens the grip, and a stiffer piece accommodates that stress less. If it is already stuck, do not lever it off by the rim; sometimes remaking the part is the safest route.
Scraping, trimming and finishing
Smoothing still-soft clay, removing a cohesive burr and scraping off a firm excess are different operations. Test the tool on a scrap while supporting the opposite side: it should take off a controlled shaving without dragging slurry, chipping or raising dust. Hansen links medium leather-hard to trimming and fettling and to attaching handles and spouts, and stiff leather-hard to finer incising; treat that as a starting point for your own tests, not a rule. A very wet sponge can soften the surface first without evening out the moisture in the piece.
Past leather-hard: can you go back?
In some cases you can recover some workability by gradual rewetting, for example in a closed damp box. That does not guarantee that the shape will be preserved or that cracks will be repaired. Quickly wetting the surface does not rehydrate the piece evenly: it can soften the skin without softening an already stiff core, creating a new difference between outside and inside. Dry sanding is not a standard fix for a missed window: Princeton University’s safety guidance links finishing dry clay to dust and recommends controlling it. When the operation no longer suits the piece’s state, change the route (another tool, another sequence) or remake the part.
Quick studio troubleshooting
| What you see | Possible causes to distinguish | What to do, with the piece supported |
|---|---|---|
| Firm surface, base gives way | Difference between outside and inside, thickness, contact with support | Compare the base with a sample; keep the support and postpone turning over |
| Cracks form on the outside of the strip when bent | Stiff state, demanding curve, direction, clay body or flaw | Compare section and direction; ease the curve or adjust the state before pushing on |
| Cut drags | Dirty tool, support, sticking or clay too soft | Clean and repeat on a scrap; change one thing at a time |
| Piece sticks to the mold | Sticking, or a shape that traps the piece as it shrinks | Review the way out; stop before forcing |
| Scraping raises dust or chips | Missed window, tool, or poorly cohesive clay | Stop scraping, collect the residue with a wet method and consider rewetting or changing the operation; do not hide a crack |
SenseCraft table based on chapter 3 of the book: a starting point for investigation, not a diagnosis. Cracks usually have more than one cause.
Write down what worked so you can repeat it
One line is enough: clay body and batch, area observed, action, support, environment and result. For example: “slab of clay X, firm rim and still-soft center on plaster; clean cut on the scrap; turning over postponed”. If you have a scale, always weigh the same sample, without removing material between weighings, in a dry, non-absorbent, tared container, in the same place and away from drafts. Do not include a plaster or wood support in the weighing, since it also gains and loses water. A weight that stops changing within the scale’s resolution shows a trend, not that the piece is dry inside or ready for the kiln.
Shrinkage and measurements between the wet (WET), dry (DRY) and fired (FIRED) states get their own article in the series; the point here is not to confuse the number on the scale with the state of the piece.
Cleaning up
Pick up trimmings and splashes before they dry and wipe with a damp cloth; do not dry-sweep or use compressed air. Fundacentro, a Brazilian research institution specializing in occupational safety and health, identifies respirable crystalline silica dust as the cause of silicosis, and Princeton’s guidance details controls for ceramics.
Where this content comes from
This article summarizes chapter 3 of the book Ceramics by Hand — Foundations and Techniques Without a Wheel, a literature review organized by SenseCraft. It combines practices and studies documented in the sources below with teaching structure, tables and a diagram developed by SenseCraft. Writing was supported by AI tools and editorial review by SenseCraft. To see leather-hard in the context of all the techniques, go back to the guide to pottery without a wheel.
Sources cited
- Tony Hansen, Digitalfire. Leather hard, glossary.
- Tony Hansen, Digitalfire. Water Content, glossary.
- Fernando A. Andrade, Hazim A. Al-Qureshi and Dachamir Hotza. Measuring and Modeling the Plasticity of Clays, Materials Research, vol. 13, no. 3, 2010.
- Margaret Bohls. Drawing in Space: How to Handbuild an Expressive Teapot Set Using Soft Slabs, Ceramic Arts Network.
- Sunshine Cobb. In the Studio: Managing the Drying Process, Pottery Making Illustrated, May/June 2020.
- D. Finkelnburg. Techno File: Drying 101, Ceramics Monthly, December 2015.
- Yoshinori Itaya et al. Drying-Induced Strain-Stress and Deformation of Thin Ceramic Plate, ChemEngineering, vol. 4, no. 1, 2020.
- Princeton University, Environmental Health and Safety. Ceramics, safety guidance.
- Fundacentro. Sílica e silicose (in Portuguese).
Limits
- This article summarizes published sources; it is not the result of SenseCraft testing. The practices cited belong to the authors and institutions named.
- No water content, drying time or touch signal defines leather-hard for every clay; the stages shift with the clay body, thickness, support and environment.
- The numbers in the text are fictional calculation examples, not values for any clay body.
- A firm surface, a lighter color or a stable weight on the scale does not prove the piece is dry inside or ready to fire.
Basis: literature review — original article based on the October 2026 Portuguese edition of the SenseCraft handbuilding book, chapter 3. The corresponding material is also available in English in Ceramics by Hand — Foundations and Techniques Without a Wheel (November 2026 edition), with primary sources listed at the end.