
Pottery defects — cracks, joint separation, warping, crazing, crawling, pinholes in the glaze — are easier to deal with when you separate the sign from the cause. A crack is what you see; “it dried too fast” is a hypothesis. The order of work is always the same: hold the piece, describe, measure, form hypotheses, compare, and only then decide whether to prevent it next time, rework the piece or remake it.
This article is part of the pottery without a wheel guide series. The practices for each stage have their own articles — drying, joining, glazing and firing. Here the subject is reading what has already happened.
First, the safety decision
Before looking for the cause, prevent the piece from accidentally moving on to the next stage. Label it and keep it apart from released pieces. Hold back vessels with a through crack, a handle or base coming loose, glaze flaking off, a sharp rim, a leak or an unstable base. Holding a piece is a provisional decision not to use it; it does not say that all these signs share one cause.
Examine the piece once it is cool, on a stable bench in good light; do not run a finger over a chip or carry weight by a suspect handle. Avoid anything that spreads ceramic dust, such as dry sanding, dry brushing or blowing; Princeton’s safety guidance recommends wet cleaning to control exposure. If there is loose material, photograph it and note its position before cleaning; if it cannot be cleaned safely, keep the piece isolated.
If the problem comes with an error code, an unusual smell or damage to the kiln, the kiln operator should assess the issue using the equipment manual.
Describe the sign before you name it
Note position, extent and orientation in plain words. Does the line start at the joint or cross it? Is it inside, outside or on both faces? Has the glaze pulled back into rounded islands, or are there loose flakes with sharp edges?
Photograph the whole piece, the area and a close-up with a scale in the same plane. Raking light reveals relief; changing the direction of the light keeps a shadow from looking like a crack.
A useful note: “Piece T04, received cool after firing E12; line crosses base and wall; use suspended; no intervention.” It says more than “the kiln broke my bowl” and does not assign a cause too early.
At what stage did the defect appear?
Build the timeline from the inspections: after assembly, after the support is removed, during drying, before and after bisque firing, with the glaze dry, after the final firing, in use. The first record in which the sign appears tells you when it was noticed, not when it began.
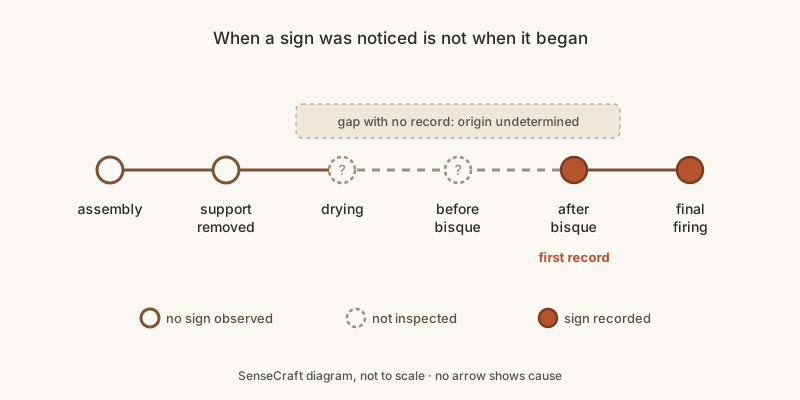
SenseCraft teaching diagram based on chapter 26 of the book Ceramics by Hand, not to scale. The gap between two inspections remains a gap: the diagram does not show cause.
“Not observed” only means that the method used did not reveal the sign; it is not the same as “did not exist”. A covered surface is recorded as not inspected. Also separate origin from worsening: a flaw created in a joint can open during drying and only become obvious after firing.
Measure the same thing at each stage
Choose references you can find again: on a platter, two axes, four points on the rim and the base plane; on a pot, heights at marked positions and diameters in a defined plane. Do not compare a width taken from an oblique photo with a diameter measured with a ruler.
Check the reference itself. Turn the piece on the same flat surface without dragging it: if the high point turns with the piece, the deviation is in the piece; if it stays in the same place on the table, suspect the table.
A ruler marked in millimeters does not justify recording hundredths. Repeat the reading and note the spread; if the difference between two conditions is similar to that spread, the conclusion stays limited.
Hypotheses you can compare
Gather the clay data sheet and batch, thicknesses, joining method, support, drying, bisque, glaze and kiln load. For each hypothesis, write why it is plausible, what still needs checking and which comparison would help. Several can coexist.
| Question | Record to look for | Limit of the reading |
|---|---|---|
| Was the sign visible earlier? | Photo and sheet from the previous stage | Absence in a photo does not rule out a hidden flaw |
| Does it follow the geometry or the joint? | Drawing, section, orientation | Matching location does not prove a mechanism |
| Does it follow the material or the batch? | Comparable, labeled samples | Batch can be confounded with date or with who made it |
| Does it follow the kiln position? | Actual load map, cones, firing record | One cone does not represent the whole piece |
| Did it appear after use? | Date, condition and use history | Do not reproduce a dangerous exposure |
SenseCraft table based on chapter 26 of the book.
A quick quality check: for each hypothesis, can you name a record that would contradict it? If nothing could contradict it, it is not yet useful for a test.
Cracks in unfired clay and in the base
Uneven drying shrinkage creates stress: the area that has already stiffened restrains the area that still has to shrink. Geometry, differences in thickness and exposure all matter; grog does not prevent every crack. Covering the piece after a strong moisture gradient has formed does not undo the earlier damage.
Ask when the line appeared: during a bend, cut or press (look at working condition and back support); after a transfer (sticking to the support, flexing); or while the piece sat still during drying (exposure of the faces, thickness, restraint).
In the base, compare the center, the joint band and the wall. An S-crack does not prove, on its own, a lack of compression; a line around the perimeter does not prove, on its own, a lack of slip.
Did it crack in the kiln or while drying?
Often you cannot tell. Picture a crack in the base first seen after the bisque. If it already existed during drying, earlier records may show signs of the crack or conditions that favor it, such as uneven drying, but small or hidden cracks go unnoticed. So earlier photos with no visible crack do not prove it formed in the bisque either. Comparing with pieces from the same load helps investigate firing-related mechanisms, without settling the origin on its own. And without a photo of the underside before the bisque, neither hypothesis can be ruled out. Record “origin undetermined”, hold the piece and start photographing the underside of every piece before firing.
Can you repair a crack in clay?
Only while the material can still be worked, both faces are accessible and the affected area can be removed and the joint rebuilt with back support — and that is a new assembly, to be followed stage by stage. Rubbing water or a film over the line does not prove continuity inside. A dry crack or an uncertain internal joint: hold the piece and consider remaking it.
Joints that separate
Before blaming the slip, check whether the parts fitted without force and whether the pressure really knit the joint; a joint smooth on the outside can hide an opening inside. Compare the condition of the parts at the moment of joining: components of the same clay shrink differently if they started at different moisture levels.
Once fired, a detached handle or a cracked base cannot be put back into service with adhesive, glaze or another firing alone. Do not offer such a piece as a mug for hot drinks.
Warping, collapse and a piece that rocks
These are three different records. Warping is a change of shape relative to the reference; collapse is a more substantial loss of structural support, such as a wall that sags; instability is failing to keep the expected footing, which can happen without visible warping.
In the fictitious example of a slab platter, the deviation at the center point was +1.0 mm dry, +1.5 mm after the bisque and +4.0 mm after the final firing, always in the same direction. The change: +0.5 mm up to the bisque and +2.5 mm up to the final firing. The largest increase came in the final firing, but the deviation already existed — the investigation looks at the form and the support during that step without forgetting how the piece was formed.
Do not press a dry piece to make it sit flat. A drying support is not kiln furniture; any support that goes into the kiln goes through the kiln operator. Deformation bars such as Digitalfire’s PPD test compare clay bodies under defined conditions, but they do not directly predict how a platter will behave.
Pottery cracked after firing
Ask for the actual load record (position, cones, cooling, unloading) and check whether the piece already had a line, was rewetted during finishing or was knocked in transport. A cavity in a fragment does not prove the piece “exploded because of an air bubble”.
Dunting is the term for cracks caused by thermal stress during the firing cycle: parts of the piece change temperature and size at different rates, during heating or cooling — cooling is the stage most often discussed. Digitalfire links the problem to uneven cross-sections and rapid temperature changes. On its own, the term does not point to a temperature or a wrong schedule. Look at the edge of the crack: glaze rounded over the opening suggests it existed when the glaze melted; a fracture that cuts through an already formed glaze layer suggests the opposite. This helps order events, but it is not a clock.
Glaze defects: reading the coating
Why does glaze pull back and leave bare clay?
This is crawling: the coating gathers into rounded patches and leaves areas of the body exposed. Digitalfire links it mainly to excessive shrinkage of the glaze layer during drying, when it cracks before going into the kiln; Mayco’s sheet also lists glaze applied too thick or pooled, dust, oil residue from hands and over-polished greenware. These are hypotheses, not a guaranteed list for every product. A network of cracks in the still unfired glaze layer is a warning — record it before covering it with another coat.
Pinholes, craters and bubbles
Describe before you classify. According to Digitalfire, a pinhole is a small opening that goes through the glaze to the body, and a pit is a shallow depression that does not go through the glaze; gas-related openings that fail to heal while the glaze is molten are among the variables. Larger craters and marks from broken bubbles are described separately, without assuming the same mechanism. Body bloating is something else: a bubble in the clay body itself, visible even where there is no glaze, linked to a firing condition the material cannot tolerate. Do not cut the piece dry to check.
To compare, count only within a defined area: 12 pinholes in 40 cm² gives 0.30 per cm²; 4 in 20 cm², 0.20 per cm² — the raw count would hide the difference in area. “Extend the hold” is not an automatic answer — more heatwork can bring running or warping; a change to the firing is a trial agreed with the kiln operator.
Crazing and shivering: what is the difference?
Crazing is a network of cracks in the glaze. According to Digitalfire, it happens when the glaze’s thermal expansion is higher than the body’s: on cooling the glaze is stretched and cracks. Shivering is the opposite: excessive compression, and the glaze comes off in flakes, especially on rims and edges. A localized chip from a knock does not prove shivering. A piece shedding glaze flakes is held; rounding the rim does not remove the mechanism.
Intentional crackle does not settle food use either. Mayco states that dinnerware suitability depends on a chemically durable fired surface without texture, and that food-contact testing of the finished ware is the responsibility of whoever makes and sells it. A smooth piece that does not leak does not prove there is no chemical migration; the cited FDA guidance addresses lead, using its own methods, and does not certify ceramic products for use in Brazil.
Is a damp mark under the pot a leak?
It may be a leak, water passing through a porous body, water trapped in the foot after washing, or condensation. Dry and document before comparing, and do not use a hot drink, food or a chemical to “test” a suspect piece.
Prevent, rework or remake
Preventing means changing a future stage; reworking means intervening on the current piece, which gains a new history; remaking means giving up on that piece. All three can be right, and the work already invested does not make a repair appropriate.
| Observed situation | Starting decision | What is needed to move on |
|---|---|---|
| Accessible flaw in clay that can still be worked | Consider a controlled rebuild | Access, compatible condition, full follow-up |
| Dry crack or uncertain internal joint | Hold and consider remaking | A specific procedure, no surface cover-up |
| Glaze defect with no known structural damage | Investigate the system before refiring | Technical approval and inspection criteria |
| Flaking, through crack or instability | Suspend the intended use | Appropriate assessment; appearance does not release it |
| Insufficient evidence | Keep the decision pending | Identification, records or a suitable test |
SenseCraft table based on chapter 26 of the book.
Does refiring fix the defect?
Not as a rule. A second firing is another thermal operation, not an undo button: it can bring running, warping or damage to the kiln, and crazing that temporarily disappears does not show a durable glaze fit.
Where this content comes from
This article summarizes chapter 26 of Ceramics by Hand — Foundations and Techniques Without a Wheel, a literature-based guide compiled by SenseCraft. It combines technical documentation and manufacturer guidance cited in the sources below with teaching organization, tables and a diagram developed by SenseCraft. The writing was supported by AI tools and edited by SenseCraft. To see defects in the context of all the techniques, go back to the pottery without a wheel guide.
Sources cited
- Tony Hansen, Digitalfire. Drying Crack, uneven drying shrinkage; Dunting, thermal stress cracks in firing; PPD Pyroplastic Deformation Test, deformation of clay bodies in firing.
- Tony Hansen, Digitalfire. Crawling and Glaze Pinholes, Pitting.
- Tony Hansen, Digitalfire. Glaze Crazing, Glaze Shivering and Body Bloating.
- Mayco. Crawling (PDF), causes of crawling.
- Mayco. Dinnerware Suitability and ACMI Information, durable surface and responsibility for testing the finished ware.
- FDA. CPG Sec 545.450 Pottery (Ceramics); Import and Domestic – Lead Contamination, US reference on lead release.
- Princeton University EHS. Ceramics, dust and wet cleaning.
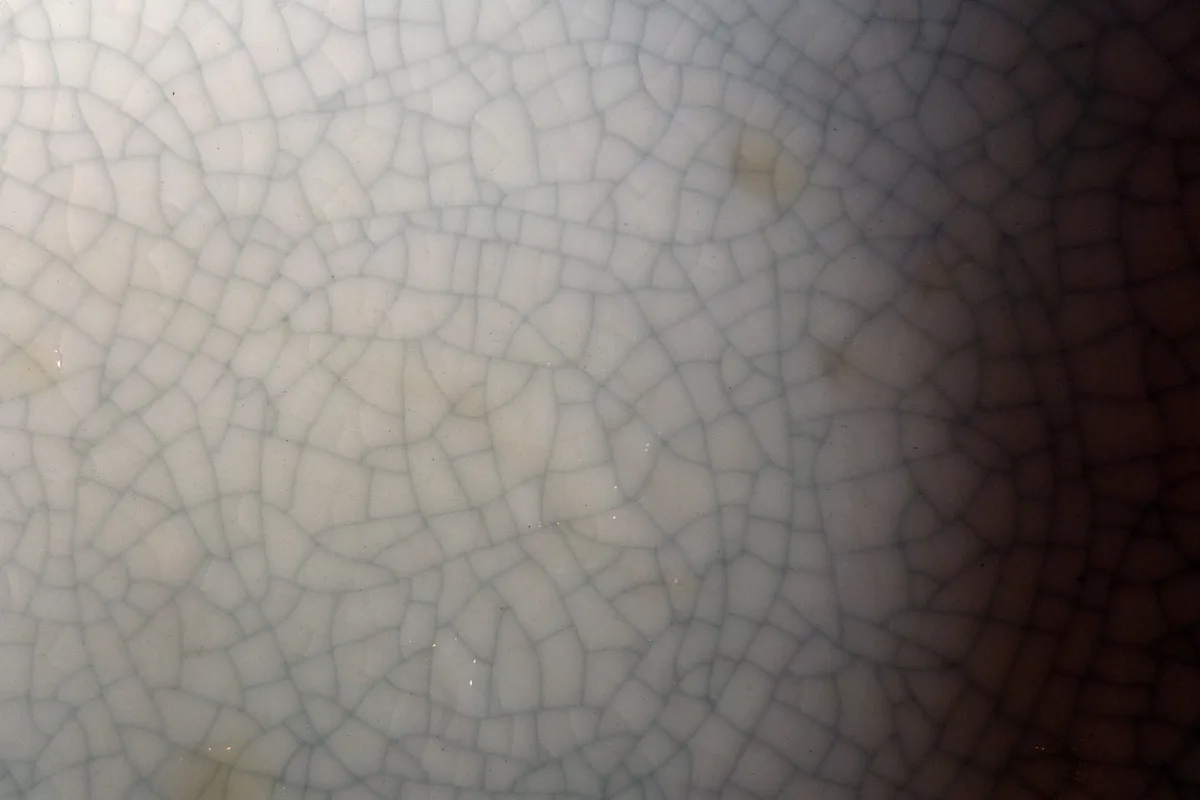
Cover image: Ceramics glaze crazing.jpg, photo by Lara604 (Flickr) on Wikimedia Commons, CC BY-SA 2.0 license. Cropped and resized by SenseCraft; the cropped version is shared under the same license.

Limits
- This article is a synthesis of published sources, not the result of SenseCraft testing. The calculations in the text are worked examples with fictitious values, not tolerances or targets.
- The investigation sequences are studio proposals: they are not a standard method, a certification or a professional product diagnosis. No number of samples guarantees the absence of defects.
- A repaired, refired or better-looking piece is not thereby fit for food, hot drinks, the microwave or load-bearing use. This text does not cover kiln repair.
Basis: literature review — original article based on the October 2026 Portuguese edition of the SenseCraft handbuilding book, chapter 26. The corresponding material is also available in English in Ceramics by Hand — Foundations and Techniques Without a Wheel (November 2026 edition), with primary sources listed at the end.