
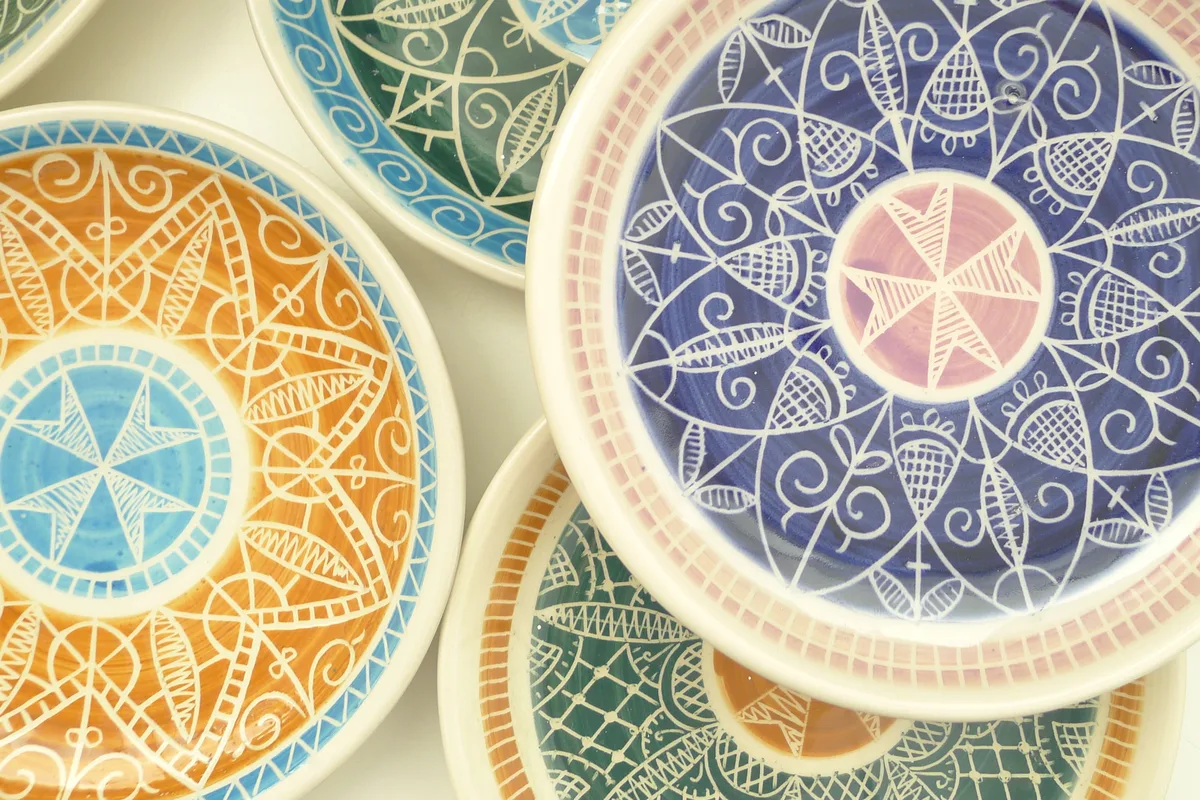
In pottery, slip is a fluid mixture of clay and water. This article is about decorative slip: a clay-based coating, often with colorants, applied to change the color or surface of a piece. In its simplest form, it is clay, colorant and water brushed over clay that has not been fired yet. To reduce the risk of the layer cracking or flaking off, choose an identified product, apply it at the stage its data sheet allows, and first make a test tile on the same clay body that goes through the same firings as the piece.
This article is part of the pottery without a wheel guide series. Textures and appliqués are covered in how to stamp clay and add texture; here the subject is the color layer. The approach is for someone using ready-made commercial products, a brush and an electric kiln run by a competent person; mixing slip from dry materials and setting firing schedules are out of scope.
What slip is in pottery
Slip adds an interface to the piece: the layer has to move with the clay body through drying and firing. A simple colored slip can shrink a lot as it dries and has a short application window. If it shrinks much more or much less than the body, it can crack or peel. Commercial slips may contain ingredients that change adhesion, melting and firing behavior — so the name on the jar does not reveal the recipe or guarantee that it works at any stage.
Do not confuse this decorative slip with joining slip, which bonds two pieces of clay (how to join clay): they share ingredients, not the job.
What is the difference between slip, underglaze and glaze?
- Decorative slip and engobe — related clay-based coatings that change color and surface, usually applied to unfired clay. In US usage, “engobe” sometimes names formulations that also work on bisque; usage varies, so follow the instructions for the exact product.
- Underglaze — a commercial category of ceramic decoration, almost always sold ready to brush. It usually goes under glaze, although some lines can be left without a glaze coat for specific uses. Not every jar of underglaze is “plain slip”.
- Glaze — a coating formulated to develop a glassy surface in the intended firing. It can be transparent, translucent or opaque, glossy or matte; matte does not mean glass-free.
Manufacturers use these names in overlapping ways. Mayco calls its Stoneware Engobes line a hybrid of slip, glaze and underglaze and lists application on wet clay, greenware or cone 04 bisque, with a final firing between cones 5 and 10. That describes that line. It does not mean any colored slip can go on bisque. The same page warns that a heavier application can change firing behavior and recommends testing first.
Does slip need a clear glaze?
It depends on the product, the finish you want and the use of the piece. Some slips and underglazes can be left without a glaze coat for specific uses; others need glaze on top, and the data sheet says which. A clear glaze also changes color and contrast, so it belongs in the test tile from the start. For a piece that will touch food, having glaze on it does not prove it is suitable: that depends on the whole system and is the subject of glazing.
In this text, greenware means clay that has not been fired yet (wet, leather-hard or dry), and bisque means the piece after its first firing.
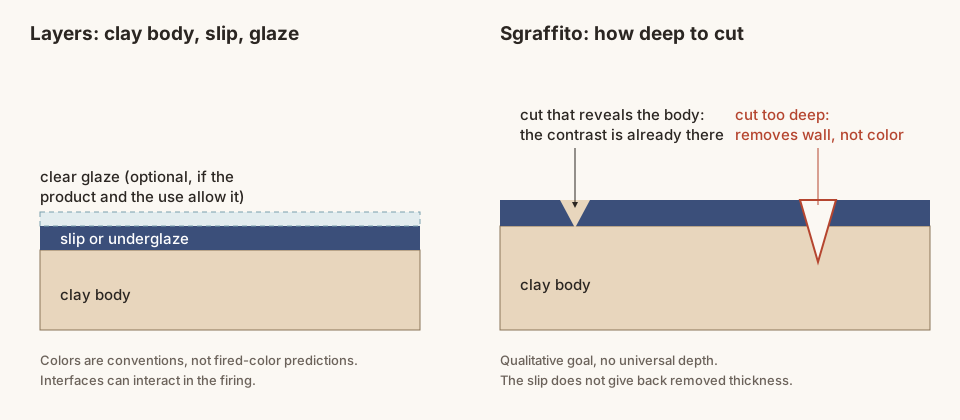
SenseCraft teaching diagram based on chapter 22 of Ceramics by Hand, not to scale. Colors are reading conventions, not fired-color predictions.
Read the label before the color
Write down the manufacturer, line, exact code, name, batch and opening date. Copy from the current data sheet the stage at which the product can be applied, the firing range and the restrictions. A name like “cobalt blue” may be just a trade description; it does not tell you the composition.
The AMACO V-333 Avocado color page is a good reading example: it recommends HF-9 Zinc Free Clear, warns that with HF-10 the color may shift, and recommends firing test tiles before using each new batch of glaze. The useful conclusion is to check the exact color and the exact clear — not “every green needs a zinc-free clear”. The Mason stain guide points the same way: each code carries its own notes on zinc and calcium in the glaze. An oxide, a carbonate and an industrial stain with a similar color cannot be swapped in the same amount.
A product without reliable identification, or without enough technical information to decide how to use it, stays set aside.
Is slip toxic? Studio precautions
Read the label and the safety data sheet for the product and for the market where it is sold. Mayco explains that, in the US, the safety data sheet (SDS) is a workplace document, while consumer precautions are on the label; browsing the brand’s portal does not replace reading the label and the current sheet for the line you use, in your market. Note the batch when it is given.
The UK HSE sheet CR1, written for glaze and color preparation in industry, deals mainly with respirable crystalline silica, notes that glazes and colors may contain other hazardous substances — lead, cobalt and cadmium among them — and advises buying ready-made glaze, choosing dust-free forms, cleaning wet or with suitable vacuuming, and never using brushes or compressed air to remove dust from skin or clothing. It is UK prevention guidance, not a rule for every country.
In the studio: ready-made liquid products, no food nearby, never put the brush in your mouth, no dry sweeping and no blowing off scraps. Cleaning water goes into a labeled container and is disposed of according to its composition and local rules; leftover color does not go down the drain or back into clean clay.
When to apply slip: what clay stage?
The stage the product allows comes first. Within it, the piece has to take the water and the brushstroke without losing its shape. A slab that is too soft can warp under the brush; a surface that is too dry pulls the water in quickly and the layer drags. Bisque behaves differently.
Try it on a companion test piece: same clay body, comparable wall thickness and drying conditions, and similar geometry where it matters. Watch whether the brush leaves a groove, whether the surface lifts, whether the layer drags and whether the piece changes curvature. A firm face does not guarantee the core is the same — check edges, base and thick areas. What changes at each stage is in leather-hard clay.
Do not soak a dry piece to make it “go back” to leather-hard, and do not cover grease or dirt with more color. Adhesion before firing and compatibility after firing are different questions: the test tile goes through every step the piece does.
Can you put slip on bisque?
Only if the product says so. Some commercial lines allow bisque; an ordinary colored slip made for unfired clay does not gain that property by being in the same jar. When in doubt, look up the data sheet.
How to brush on slip
- Mix the product as the data sheet says, reaching what has settled at the bottom without splashing. Pour a small amount into a labeled container.
- Do not add water to the whole jar out of habit. If the data sheet allows adjustment, test it on a small portion and write down how much you added. A thickened or contaminated product is not always fixed by thinning.
- Choose a wide, soft brush for areas, a round brush with an intact tip for lines and a small one for details.
- Load the bristles without a drop hanging, rest your forearm and make a short test stroke. More pressure spreads the bristles and widens the line, but it can lift the layer underneath.
- Rotate the piece or its support instead of twisting your wrist or resting your hand on the decorated surface. One controlled pass tells you more than several wet corrections.
How many coats of slip?
“Two coats” is not a thickness. Brush, viscosity, absorbency of the piece, pressure and size of the area all change the deposit. Define a coat as one complete coverage of the area in your procedure, count touch-ups separately and respect the time between coats that the product gives. Dry to the touch on the film does not mean the piece is dry. Stacking coats beyond the instructions does not buy opacity: it can peel.
Design and contrast. Test the motif at full size: the wall of a mug curves the design. To transfer it, prefer a loose paper template; not every pencil or transfer paper is kiln-safe. Two colors of similar lightness blur together from a distance, and the same color can look different wet, dry, bisque-fired and under a clear glaze.
How to do sgraffito on pottery
Sgraffito is scratching through a layer of slip or underglaze to reveal the clay underneath, as AMACO’s glossary defines it. In the basic approach:
- Apply a compatible decoration on leather-hard greenware — firm enough to hold its shape, still cuttable without crumbling.
- Wait for the layer to lose its wet shine and firm up, without turning powdery.
- Test a short stretch with a clean tool with an intact edge: a point makes a fine line; a small loop tool removes a wider band.
- Cut only until the contrast shows. Digging further removes wall, not color — and the slip does not give back the removed thickness.
- Support the piece by an unpainted area, keep your free hand clear of the tool’s path in case it slips and collect the scraps without rubbing the design or blowing.
If the product’s data sheet calls for another stage or another route, it takes precedence.
Why does sgraffito chip or smear?
Material that smears, a cut that closes up or a film that drags calls for waiting for the layer to change stage, or changing tool and gesture. A layer that chips, comes off in flakes or turns to dust calls for stopping: more force does not bring back a lost window, and wetting only the skin does not fix the core. A crack that appears does not become a decorative line and should not be hidden with color.
The remaining thickness is a running total. In the book’s example, a 6.0 mm wall that lost 0.6 mm in finishing and another 0.4 mm in sgraffito ends up about 5.0 mm thick at that spot. The color layer does not count as structural thickness.
Paper resist and wax resist
A resist is an area protected while you paint. The order decides what shows: clay body → resist → color reveals the body; color A → resist → color B preserves color A.
- Paper: cut clean, uncoated paper, lay it down with the least moisture needed and paint without pushing product under the edge. Lift it with tweezers once the color no longer runs, but before the film hardens and tears.
- Ceramic wax resist: Mayco AC-302, for example, is a water-based product that repels the next layer and can go on greenware, bisque or unfired color. Candle wax, polishing wax or household products are not substitutes. Use a dedicated brush: wax in the wrong place is not easy to erase.
Remove the paper and loose residue before firing. Ceramic wax resist stays on the piece and burns off in the firing, according to the manufacturer’s instructions.
Slip test tiles that answer a question
A good test tile answers a concrete question. “Which one looks best?” is too broad; “on this clay body and in this firing, does the chosen clear keep a fine line legible?” tells you what to do and what to record.
For layering, compare four tiles: A alone, B alone, A over B and B over A, on the same clay body and in the same firing, plus an undecorated strip as a reference. A darker overlap may just be more material deposited, not a chemical reaction; that is why the number of coats and the brush load go into the record. Write observations and hypotheses in separate columns: “the edge of the line is blurred” is an observation; “the glaze dissolved the stain” is a hypothesis.
Slip problems: what to check
| Sign | Hypotheses to check | Next step |
|---|---|---|
| Brush opens gaps in the layer below | Stage between coats, pressure, too much reworking | Repeat on the test tile changing one condition |
| Film lifts before firing | Dirty surface, deposit, incompatible stage | Stop and check identification and preparation |
| Sgraffito chips | Cutting window, tool, adhesion | Test a new stretch on the test tile |
| Color changed under the clear | Glaze, deposit, firing | Compare with an unglazed tile and with the exact data sheet |
| Design got covered | Opaque or thick glaze, low contrast | Test transparency and design before the piece |
| Crack follows an old joint | Construction and drying, not only decoration | Do not mask it; investigate the piece |
SenseCraft table based on chapter 22 of the book. The hypotheses are starting points; a defect after firing does not point to its own cause.
Do not dry-sand a surface that is peeling: it makes fine dust and does not fix adhesion. And do not count on another firing to correct it — a refire is a new process condition, with its own risks.
Drying and firing the decorated piece
Keep drying conditions similar on both faces and do not stack decorated faces; a piece with a damp core does not go into the kiln because the surface turned lighter (how to dry pottery without cracking). Give whoever runs the kiln the clay body, the color codes and batches, the areas that must stay free of product and the planned glaze. Do not decorate the area that touches the kiln shelf without agreeing first.
A good look after firing does not prove resistance to washing or food use. Glazing is the subject of the next article in the series.
Where this content comes from
This article summarizes chapter 22 of Ceramics by Hand — Foundations and Techniques Without a Wheel, a literature-based guide compiled by SenseCraft. It combines manufacturer guidance and technical practices cited in the sources below with teaching organization, a diagnostic table, a diagram and studio routines developed by SenseCraft. The writing was supported by AI tools and edited by SenseCraft. To see decoration in the context of all the techniques, go back to the pottery without a wheel guide.
Sources cited
- Mayco. Stoneware Engobes, product line page (use and FAQs).
- AMACO. V-333 Avocado Underglaze, color page (recommended clear and batch testing).
- Mason Color Works. Reference Guide, notes by stain code.
- Mayco. Safety Data Sheets, safety data sheet portal.
- Health and Safety Executive. CR1 — Glaze and colour preparation, silica control sheet for ceramics, March 2019 (PDF).
- AMACO. Sgraffito, manufacturer glossary.
- Mayco. AC-302 Wax Resist, product page.
Cover image: Sgraffito plate, photo by Maryele on Wikimedia Commons, CC BY-SA 3.0 license. Cropped by SenseCraft and shared under the same license.

Limits
- This article is a synthesis of published sources, not the result of SenseCraft testing. Calculations and measurements in the text are worked examples, not rules.
- There is no universal application stage, number of coats or layer thickness: the data sheet of the exact product, the clay body and the firing decide.
- A nicely decorated piece does not prove that it is food safe, holds up to washing or can go in the oven.
Basis: literature review — original article based on the October 2026 Portuguese edition of the SenseCraft handbuilding book, chapter 22. The corresponding material is also available in English in Ceramics by Hand — Foundations and Techniques Without a Wheel (November 2026 edition), with primary sources listed at the end.