
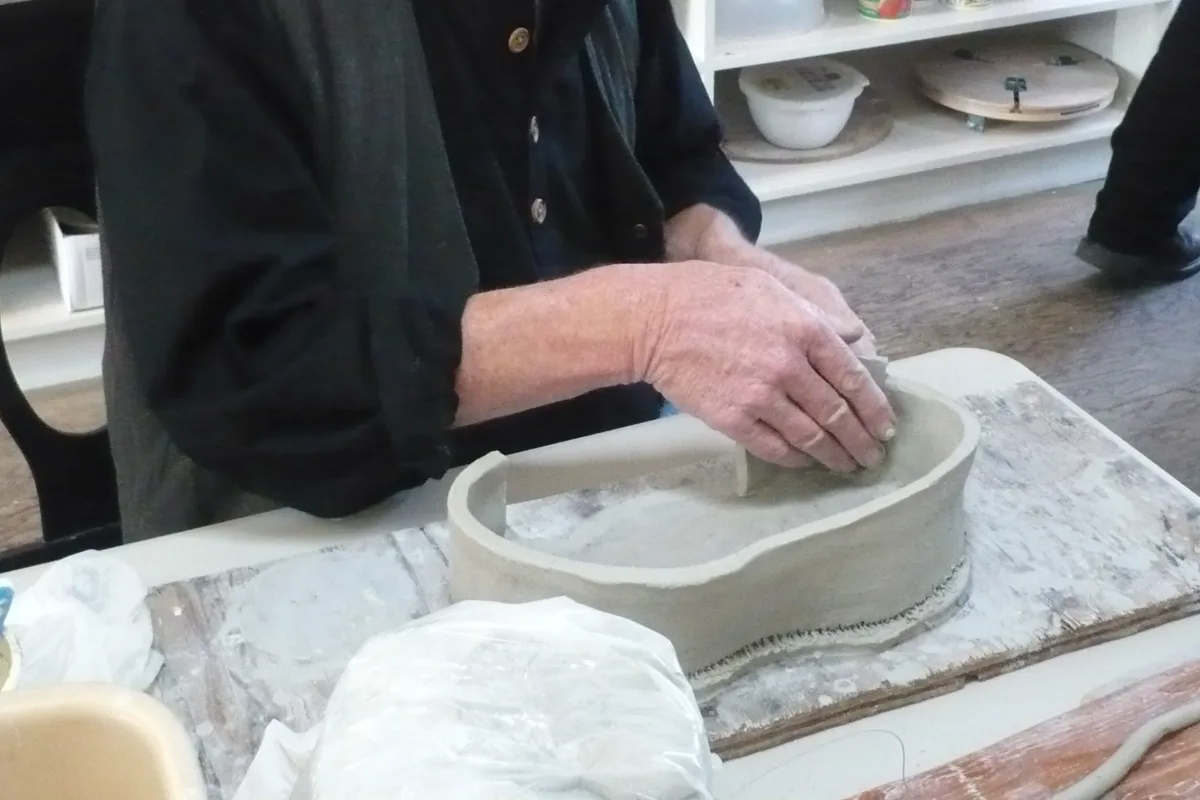
To make a slab mug, you calculate the wall pattern on the mid-surface of the slab, curve the strip over a support without pulling the ends, close the seam while backing it from the other side, and release the support at the point the construction method calls for, without letting it trap the shrinkage. The geometry sets the size of the cut; the state of the slab decides whether it bends without cracking. The two are checked separately.
This article is part of the series built around the guide to pottery without a wheel. Rolling, measuring and cutting the slab are covered in how to roll out a clay slab; here the subject is turning the slab into a mug wall: the pattern, the curve, the seam, the belly and releasing the support.
Choose the wall shape before you cut
A curved strip gives a continuous wall interrupted by one seam. Flat panels give faces and corners, as in a square mug. An annular sector becomes a sloping wall, a truncated cone. Each choice changes the cut, the reference lines and the assembly order; adjusting the length of the same strip does not fit every form.
Draw a plan, a side view and a section of the wall. Mark the rim, the bottom line, the thickness, the seam and where your hand will go in to work the last joint. Note whether each measurement refers to the inside face, the outside face or the mid-surface. Start with a low mug with a wide mouth: a taller wall, a tighter radius or a sloping wall changes the support you need, and experience with a low piece does not carry over to a taller one on its own.
| Design change | What to watch | First response to try |
|---|---|---|
| Taller wall | Bulging at the bottom and access to the seam | Lower the height or rethink support and reach |
| Tighter curve | Cracks on the outer face, a fold inside, ends that stay straight | A larger radius or a fresh look at the slab’s state |
| Wider flat panel | Flexing in the middle while joining | Backing support closer in; test a smaller panel |
| Thicker wall or seam | Weight and a zone that stays softer | Review the whole section and watch the drying |
SenseCraft table based on chapter 10 of the book. It guides observation; it does not calculate strength.
How to calculate the slab size for a mug
Cylindrical wall: use the mid-surface
The slab has thickness, so its inside and outside faces have different lengths. For a cylinder with inside diameter Di and thickness t, the diameter of the mid-surface (the surface halfway through the slab’s thickness) is Dm = Di + t, and the strip length is π × Dm. In the book’s example, with Di = 80 mm, t = 6 mm and a height of 80 mm in wet clay, the usable strip measures about 270.18 × 80 mm. The inside circumference would give 251.33 mm, almost 19 mm less. That difference is neither a tolerance nor a measure of how much the clay will stretch. The calculation is a geometric approximation for a wall of even thickness, before the distortions of forming and finishing the seam; it does not replace checking the template, nor does it predict how plastic clay will behave.
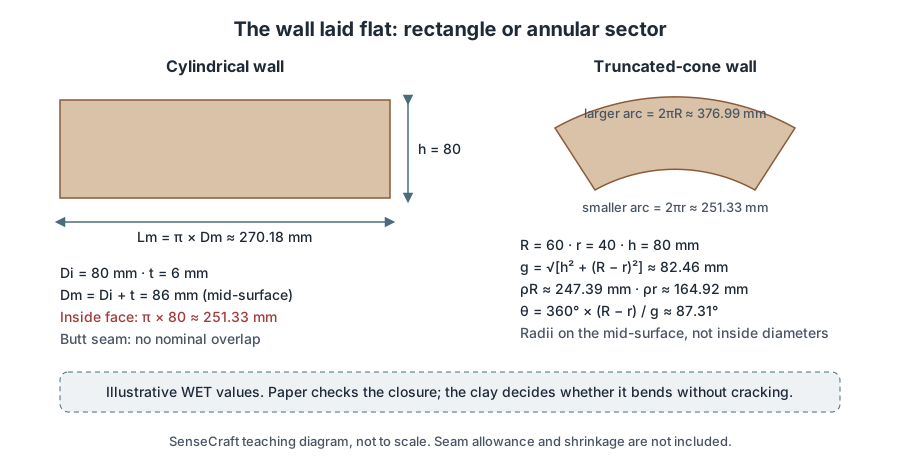
SenseCraft teaching diagram based on chapter 10 of Ceramics by Hand, not to scale. Illustrative WET values, without seam allowance or shrinkage.
Write down separately the usable length, the allowance that will be trimmed off and any overlap that stays in the piece. If you want 3 mm of removable allowance at each end, the raw cut becomes 276.18 mm, but the usable length is still 270.18 mm. To reach a fired size, use shrinkage factors measured on your own clay body, as explained in how to roll out a clay slab, not a generic percentage.
Tapered mug: the pattern is an annular sector
A right truncated cone can be laid flat without distortion in the ideal case. With larger radius R, smaller radius r and height h on the mid-surface, the slant height is g = √[h² + (R − r)²]; the pattern is a sector between two arcs with radii g × R / (R − r) and g × r / (R − r), and an angle of 360° × (R − r) / g. For R = 60 mm, r = 40 mm and h = 80 mm, that gives radii of about 247.39 and 164.92 mm and an angle of 87.31°. Daryl Baird, writing for Ceramic Arts Network, uses templates of this kind to make sets of slab bowls. These values describe laying flat the mid-surface of a wall of even thickness, without accounting for distortion during forming or for seam allowance.
How do you make a paper template for a slab mug?
Draw the rectangle or the two arcs with the calculated values, without rounding halfway through the calculation, and cut it out in paper. Mark the bottom edge, the rim and the seam side, close the template and check which way it goes together. Any removable seam allowance is drawn separately. Paper shows errors of design and access, but it does not behave like clay: a paper template that fits together does not guarantee that the clay slab can be formed without cracking.
How much does a beveled seam shorten the mug?
If the pattern was drawn to close exactly on the mid-surface, a butt seam keeps that length. An overlapped seam can reduce the usable length, depending on the geometry of the bevels and how far they overlap. In the book’s example, with both ends beveled inside the pattern line, the ring loses about one slab thickness: if a 138 mm usable strip loses 5 mm at the join, the reduction is about 3.6%. That is a geometric example, not a rule for every beveled seam. Decide on the seam before cutting and write the convention on the template itself.
Test the curve on an offcut
Before cutting the mug strip, bend an offcut from the same slab, at the same thickness, around the planned radius. Look at both faces: cracks outside, a fold inside and ends that stay straight are signs that the slab, the radius or the support do not match. Then position the full-height wall against the planned support, without joining it yet. A low strip may accept the curve while the tall wall bulges.
Courtney Murphy, a potter who writes for Ceramic Arts Network, describes a window between the slab being able to stand and still being able to bend; when a long strip becomes hard to handle, she joins shorter slabs instead. That adds joints, which need planning. The book gives these signs priority over labels such as leather-hard or over the clock.
Can you bend a slab that is already firm?
Tight curves call for a slab that is still plastic. Waiting longer does not give flexibility back to a slab that cracks, and wetting only the surface changes the skin, not the inside. If the offcut cracks even at a larger radius, review the radius, thickness, state and support before cutting the slab for the mug.
Curve the strip and close the seam
- Set up the work surface. Put a clean interface on a rigid board and mark the mug’s plan outside the clay. Decide where the seam will be and how your hand will reach in. The board is a temporary support, not the bottom of the piece.
- Curve gradually. Carry the strip on its support and spread the curve along the length, without bending repeatedly at one spot or pulling the ends. The middle can be curved while the last few centimeters stay straight. Vince Pitelka, a ceramics teacher, gently curves the ends against a round dowel while the strip is still flat on the table, before forming the cylinder.
- Check how the ends fit. Bring the ends together without squashing them and look for differences in height, twisting and overlap. Trim the allowance along the planned lines and remove every scrap.
- Prepare both faces. On the score-and-slip route, make shallow marks along the contact band and use slip compatible with the clay body, with no puddle between the faces. Joining itself is covered in how to join clay.
- Support the opposite side of the seam. Place fingers, a rib or a smooth support on the side opposite the area you are pressing: to work from inside, support from outside; to work from outside, support from inside. Short strokes carry clay from one edge to the other. Cover the full height, including the bottom end. If the wall dents or the line opens on the other side, stop and reposition the support.
- Reassess the form. Check two perpendicular diameters, the vertical and the bottom line. Remove or keep the support according to the planned sequence. If there is a removable rigid core, do not let the shrinkage trap it, and support the wall while taking it out.
Butt seam or overlapped seam?
Both appear in the sources. In a butt seam, the ends meet with no nominal overlap. In an overlapped seam, the ends can be beveled together, the scrap removed and the matching faces joined against a backing support; Clare Unger, in Ceramics Monthly, pinches the ends that will overlap to even out the thickness. Neither is universally stronger; what changes is the usable length, the local thickness and the access.
Square mug: size the panels by the corner
For an open rectangular wall, decide which panels run past the others. With outside width W, outside depth D and thickness t, the front and back measure W, and the sides, which fit between them, measure D − 2t. In the book’s example, at 100 × 80 mm with a 6 mm slab and a 70 mm height, that means two faces of 100 × 70 mm and two of 68 × 70 mm. Cutting all four at the outside plan dimensions would make the mug larger. With 45° miters the widths change again: mark on each panel which face carries the measurement before beveling.
Assemble on the loose board: join the first corner with wide access from inside, add the third panel and inspect inside before closing the fourth. If the last one does not fit, investigate the measurements, thickness and earlier joints; do not bow the panel to hide the error.
How to make a bellied slab mug
A mug with a belly and a curved bottom combines two cases: nearly cylindrical stretches and a doubly curved region near the bottom that no flat slab can cover without deforming. In a calculated example from the book, with 66 mm at the belly and 44 mm at the bottom, the lower edge would have to lose about a third of its length. That excess does not disappear: it turns into pleats, folds or thickening if it is not dealt with.
| Route | How it handles the excess | Example in the sources |
|---|---|---|
| Bands | The curved profile is approximated by truncated-cone bands, one per stretch; a disk closes the center | Lesley, from The Pottery Wheel blog: upper wall, curved lower wall and a disk |
| Darts | V-shaped cuts remove the excess before the bottom; the volume is worked from inside with support outside | Clare Unger: the depth and width of the darts change the angle of the curve |
| Bowl-shaped base | The curved base is formed separately over a support, and the wall is joined to its open rim | Birdie Boone, on Ceramic Arts Network |
SenseCraft table based on chapter 10 of the book.
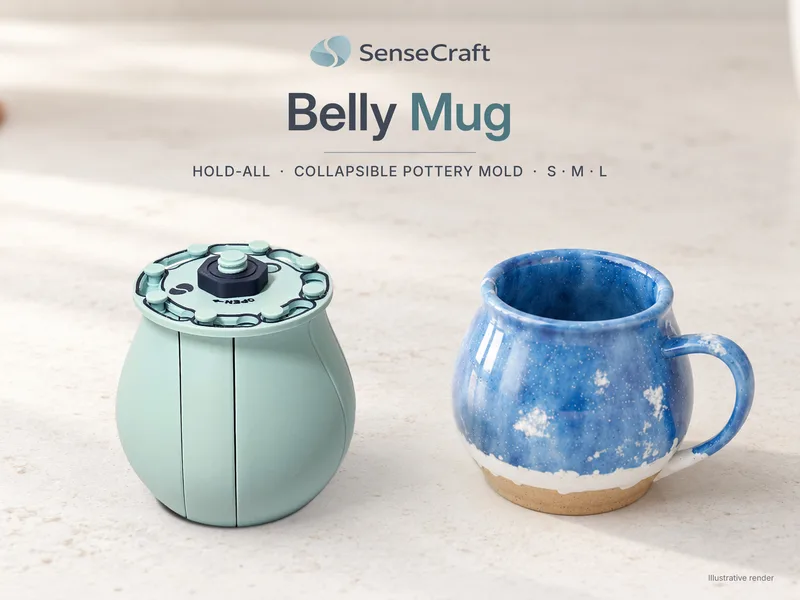
Place the divisions where the slope of the profile changes. More bands reduce the adjustment in each one and increase the number of joints to prepare, reach and finish; the book found no published rule that fixes how many bands to use. When the mouth is narrower than the belly, a one-piece rigid core with that profile cannot come out through the mouth without interference. If the bottom is still open, the sequence may allow it to come out from below; when the mouth is the only way out, split or collapsible cores are alternatives, as in the SenseCraft Belly Mug project, and the book covers those molds in a separate chapter.
Release the support without trapping the shrinkage
The wall tends to contract as it dries. A rigid core that neither shrinks nor comes out in time can restrain that movement and cause a crack next to the support; a release agent does not fix a geometric lock. Test the release gradually: reduce the contact of one part and watch whether the wall bulges, leans or follows. If the wall starts to sag, restore suitable support without compressing the clay. Releasing too early also distorts the piece; the piece’s behavior decides, not a number of minutes. Before firing, remove any wood, foam, paper and plastic.
Why does a slab mug crack while drying?
Possible causes to distinguish include a poorly blended seam, components at different moisture or firmness levels, a support that trapped the shrinkage and uneven drying. Tony Hansen, of Digitalfire, describes the S-crack in the base as a classic sign of uneven drying, almost always with the rim drying ahead of the base. Cover the mug without pressing on the rim, move it by the board and never by the rim, and follow the steps in how to dry pottery without cracking.
| Sign | Hypotheses to check | Next step |
|---|---|---|
| The strip ends do not meet | Measured on the wrong face, a short cut, a different radius | Check measurements and drawing; do not stretch |
| The seam opens when the support comes out | Incomplete contact, different states, support removed too early | Restore support and inspect; remake if the crack persists |
| The rim goes oval or leans | Transfer, uneven support, uneven drying | Compare records by stage and correct on a test piece |
| A crack next to the inside support | Restrained shrinkage, sticking, the joint or local thickness | Stop forcing the release and judge whether to remake |
SenseCraft table based on chapter 10 of the book.
A seam that has opened in clay that is still workable is not fixed by a film of slip on top: reopen the affected joint, work clay into the seam and compress the joint, or remake the component. A smooth surface does not prove continuity inside. And a mug built with no visible cracks does not prove strength, watertightness or safety for food or hot drinks: that also depends on the clay body, the glaze, the firing and specific checks.
Plan how the bottom and the handle go on
The order between joining the bottom and releasing the support depends on the form and the method. Pitelka removes the removable core before adding the bottom; Clare Unger joins the wall to a base disk during assembly. Plan that sequence before closing the wall, thinking about access to the joints, distortion and how the support will come out.
The book covers the bottom in the next chapter: take into that step the real shape of the bottom edge, the inside and outside outlines, the thickness and the position of the seam, because a regular rim does not determine the size of the bottom. Keep thickness where the handle will go and check access for the backing support before attaching it, as in how to make a mug handle.
Where this content comes from
This article summarizes chapter 10 of Ceramics by Hand — Foundations and Techniques Without a Wheel, a literature-based guide compiled by SenseCraft. It combines potters’ practices and technical guidance cited in the sources below with teaching organization, decision tables, a diagram and studio routines developed by SenseCraft. The writing was assisted by AI tools and edited by SenseCraft. To see slab building in the context of the other techniques, go back to the guide to pottery without a wheel.
Sources cited
- Vince Pitelka. Making Soft-Slab Cups and Boxes, teaching handout (PDF), 2021.
- Vince Pitelka. Joining, Attaching, Repairing, and Mounting Claywork, teaching handout (PDF), 2019.
- Lesley. How to Make a Bellied Slab Mug by Hand, The Pottery Wheel, 2024.
- Clare Unger. Stitched Mug, Ceramics Monthly, October 2025.
- Courtney Murphy. Handbuilding Nesting Bowls with Hump and Slump Molds, Ceramic Arts Network.
- Daryl E. Baird. Simple Sets: Making and Using Slab Bowl Templates, Ceramic Arts Network.
- Birdie Boone. Birdie Boone’s Belly-Bottomed Dishes, Ceramic Arts Network, 2014.
- Tony Hansen, Digitalfire. Drying Crack, glossary.
Limits
- This article summarizes published sources; it is not the result of SenseCraft testing. The measurements are calculation examples, not recommended mug sizes.
- There is no universal thickness, minimum radius, waiting time or height-to-thickness ratio: the clay body, the state of the slab and the support change the answer.
- A mug with no visible crack does not demonstrate strength or watertightness, and its appearance does not prove that it is suitable for food, hot drinks, the microwave or the dishwasher.
Where to download
Files, print profile and manual are on MakerWorld.
Basis: literature review — original article based on the October 2026 Portuguese edition of the SenseCraft handbuilding book, chapter 10. The corresponding material is also available in English in Ceramics by Hand — Foundations and Techniques Without a Wheel (November 2026 edition), with primary sources listed at the end.