
To start making fired ceramic pieces at home you need less than you might think: an identified clay body, a rigid board, a few hand tools, a way to clean up without raising dust, and access to a ceramic kiln — your own or, almost always at the beginning, a studio that fires work for others. What matters most is not the equipment: it is planning the piece’s route before you open the bag of clay.
This article is part of the pottery without a wheel guide series. The guide compares the techniques; here the subject is the home workspace, cleanup, waste and the conversation with whoever will fire the piece. If you are wondering whether you can do pottery at home without a kiln, the guide explains the difference between air-dry clay and clay that goes in the kiln.
Three distinctions before your first piece
Clay is not the same as a clay body. Clay is a natural material made up mainly of clay minerals, and it may contain other minerals; a clay body is a composition prepared for forming and firing, which can combine clays and other ingredients. A specific product name or code identifies a clay body; similar-looking products may have different compositions and firing requirements.
Drying is not firing. Drying removes the free water from an unfired piece. Firing, in a suitable kiln, changes the material irreversibly. A dry piece is hard, but it is still unfired: in contact with water it can soften or fall apart.
Finished is not the same as fit for use. Color and gloss do not prove strength, watertightness or food safety. So the first question is what the piece is for: holding paper clips, resting a brush, holding water or serving food each call for different checks.
Which clay should a beginner buy?
Start with one ready-to-use, moist clay body. Choose a product with a clearly identified manufacturer, product code and firing range, and confirm that your firing service accepts it before buying; choosing between clay families is covered in types of clay for pottery.
Set up the workspace around tasks, not furniture
Before buying a table or shelving, separate the functions: forming, storing work in progress, cleaning and collecting waste, and a corner protected from splashes for notes and your phone. They can be separate spaces or the same table used in successive sessions, cleaned between one operation and the next.
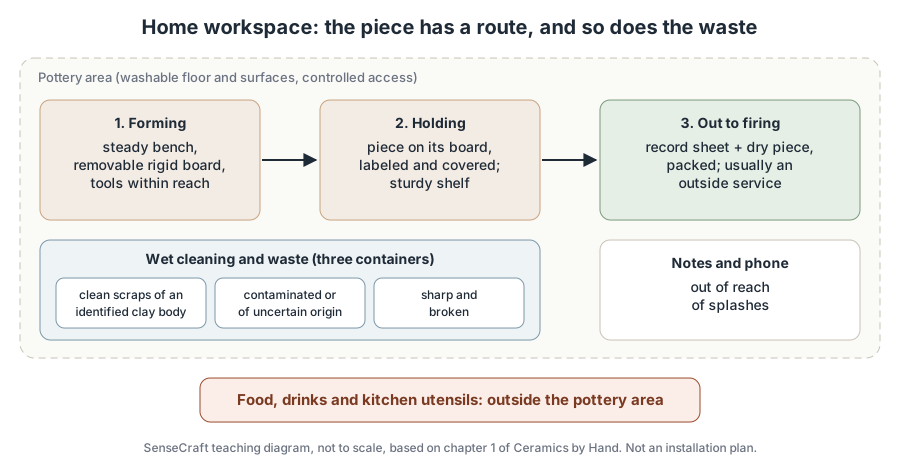
SenseCraft teaching diagram based on chapter 1 of the book Ceramics by Hand, not to scale. It shows relationships between areas; it is not an installation plan or a ventilation design.
Prefer a dedicated space with floors and surfaces that can be wet-cleaned, and control who comes through. Children, pets and visitors should not be able to reach clay, sharp tools or hot equipment.
Can I do pottery on my kitchen table?
To start, do not use the dining table or a food-preparation surface as a pottery bench, and do not share utensils between kitchen and studio. Looking clean does not prove the residue is gone, and a tablecloth on its own does not stop it from transferring. If the same bench has to serve another activity that does not involve food, use a dedicated board, keep the session to wet work with identified materials, and also clean the surrounding area and contact points before switching use. If you cannot keep the functions apart, a properly equipped shared studio is the safer alternative.
Bench surface and boards
The top must stay steady during the work and be easy to clean without trapping deposits. On top of it, use a removable work surface suited to the technique. A dedicated rigid board also lets you carry the piece without touching its walls — check first that it fits through the door and onto the destination shelf.
Canvas and fabric can mark the clay and trap residue: do not shake or dry-brush them. If the piece sticks to the board, stop; do not free it by pulling on the rim.
Tools: buy for the task
For a first pinch pot, your hands, a board, a simple finishing tool and a label may be enough. A rolling pin and guide sticks only become necessary when you choose slabs.
| Item | What it is for | Low-cost alternative and care |
|---|---|---|
| Dedicated rigid board | Supporting and moving the piece without touching the walls | A flat, sound, clean board |
| Wire cutter with handles | Cutting off portions of clay | Never wrap the wire around your fingers |
| Modeling tool | Shaping and reaching transitions | Smooth wooden spatula, free of splinters |
| Rib | Smoothing and compressing the surface | Flexible plastic card with rounded edges |
| Brush and small sponge | Applying water or slip and picking up excess | Keep clay brushes apart from glaze brushes |
| Dedicated buckets and cloths | Holding water and wet cleaning | Label them: work water is not drinking water |
| Labels and record sheet | Linking piece, materials and destination | Use the same code on the sheet, photos and board |
SenseCraft table based on chapter 1 of the book. Not a mandatory shopping list.
Choose a tool by how it fits your hand: the grip should give control without constant squeezing or a bent wrist. Needle tools and blades are stored with the point covered, in a known place — never loose among cloths. A banding wheel, slab roller and extruder can wait until the task justifies them.
Dust: what to control from day one
Clays and glazes can contain crystalline silica. The respirable fraction of that dust is fine, can be invisible under ordinary light and, inhaled over time, can cause serious, irreversible lung disease such as silicosis. Not seeing a cloud does not mean exposure is under control.
Ready-made plastic clay saves you from weighing and mixing powders, but scraps dry on the floor, on clothing and on tools. That is why a beginner’s workspace rests on three decisions:
- form and finish the piece while it is still damp, without routine dry sanding;
- do not crush dry scraps or use compressed air to clean surfaces or clothes;
- leave to a properly equipped facility the tasks that create dust and need controls you do not have, such as weighing powders, trimming dry work or spraying glaze.
Opening a window or pointing a fan at the bench does not prove the dust has been captured; the fan can spread deposits.
Do I need a mask for pottery at home?
Personal protection comes after reducing the dust you create, not instead of it. A generic mask does not make an uncontrolled operation acceptable. When respiratory protection is needed, it must match the contaminant and the task, with training and maintenance; for tight-fitting facepieces, the fit must be checked by a proper fit test. In a beginner’s home workspace, the simplest route is not to do at home the task that needs that level of control.
Read the right sheet: the technical data sheet describes properties and processing; the safety data sheet (SDS) describes hazards, handling, storage and disposal. One does not replace the other, and the classification of the moist clay as supplied does not, on its own, describe the dust created when it dries and is sanded.
Cleaning the workspace in seven steps
- Protect the work. Labeled pieces on a steady board, out of the area to be cleaned; notes and electronics put away.
- Sort the scraps. Known moist clay goes into its own container; scraps with glaze, pigment, plaster or uncertain origin stay out of that loop.
- Remove the excess from the bench without breaking dry crust hard enough to make dust; dampen it first if needed.
- Wipe with a damp cloth or sponge, rinse in the cleaning bucket and change the water once it is only spreading material around.
- Clean the spots that get forgotten: handles, edges, the underside of boards, the place where the buckets stood.
- Clean the floor with a wet method. A dry broom, a blower and an ordinary household vacuum are not a solution for ceramic dust; vacuuming ceramic dust requires equipment, filtration and procedures suited to the material and the task.
- Close the loop. Containers covered and labeled; cloths and work clothes set aside for washing, without shaking them.
Cleaning does not mean soaking: standing water makes floors slippery. If dry deposits keep coming back, look for where the residue is escaping collection.
Personal hygiene closes the loop: food and drink out of the area, hands washed before eating and when you finish, work clothes that do not travel around the house.
Can I put clay down the sink?
Do not pour clay, slip, leftover glaze or sludge down the sink. Collect the first rinse water in labeled buckets: as it stands, the solids settle to the bottom, which helps separate them, but settling does not remove dissolved substances or make the water fit for the drain. Check with your local water and waste services where the water and the solids should go, and do not copy disposal permissions from documents written for other countries.
Separate at least three streams at the source: clean scraps of an identified clay body; ceramic waste that is contaminated or of uncertain composition; and sharp or broken material. Different clay bodies are not mixed just because they look alike, and plaster chips or fired shards do not go into the reclaim bucket.
Body and loads
Adjust the effective working height — bench top, board and piece combined; there is no ideal bench height for everyone. Raised shoulders, a bent trunk or a bent wrist held for a long time call for a change: bring the piece closer, turn the board, alternate tasks. Persistent pain or tingling calls for stopping and an appropriate assessment.
Before moving clay, a bucket or a board, walk the route with the board empty. Split the load, keep it close to your body and turn with your feet, without twisting your trunk under load.
Kiln: your own or a firing service
Do I need a kiln at home to start?
No. A kitchen oven does not replace a ceramic kiln, and an electric ceramic kiln requires a suitable electrical installation, removal of heat and fumes, and a person in charge who follows the model’s manual. One kiln manufacturer warns that the electronic controller is not a safety device. For a beginner at home, paying a studio or school to fire the work is usually the simplest route.
Choose the service before you make anything: a piece made from a clay body that kiln does not accept may have nowhere to go. When it comes to firing, record the cone exactly as given: cone 06 and cone 6 are different designations, and 06 corresponds to a much lower range.
What to tell and ask the studio that will fire your work
| Send | Confirm before drop-off |
|---|---|
| Identification, number and outside dimensions of the pieces | Which clay bodies, glazes and kinds of work the kiln accepts |
| Stage: unfired greenware, bisqueware or glazed ware (say whether the glaze has been fired) | Which firing and which cone or thermal condition will be used |
| Manufacturer, code, batch and firing range of the clay body, with the technical data sheet | How the service judges whether a piece is dry and how much notice it needs |
| Each product applied and the stage it was applied at | Limits on size, weight, support and unglazed areas |
| Intended use of the piece | How to pack, who handles the work, timing, breakage and glaze runs |
SenseCraft table based on chapter 1 of the book. It is a suggested conversation, not a condition every provider sets.
The studio can fire the work and give you a firing record without certifying every property of the piece. “Fired in the studio kiln” does not mean “food safe”. When you collect it, check it against your record sheet and note any defects before deciding the next step: a crack seen after firing does not, on its own, prove the cause began in the kiln (see pottery defects).
Plan your first piece before you touch the clay
Take as an example a small pinch bowl for paper clips: open, with no handle, no lid and no added parts. Decide beforehand what counts as an acceptable result — stable on its support, rim without a sharp edge, no visible crack after the process — knowing that these criteria organize the study but do not prove anything that was not checked.
Start a record sheet with a simple code (“Study bowl 01”) and use it on the sheet, in the photos and on the board. Record facts (“rim firm, base still gives to the touch”) rather than times (“I waited a long time”). If you measure, note the dimension and the state of the piece: measurements from different stages are not directly comparable.
Checklist before your first session:
- an identified clay body accepted by the firing service;
- the supplier’s technical data sheet and SDS kept, where available; anything missing about the material clarified before use;
- a workspace with a board, minimal tools, dedicated buckets and cloths;
- a place to store the piece without holding it by the walls;
- the route to the shelf tried with the board empty;
- the chosen route (unglazed, or bisque and glaze) written on the record sheet;
- the full procedure for the technique read before you start.
Even without any clay, you can practice: set up the workspace, walk the route with the empty board and fill in the record sheet up to the name of the firing service. Then move on to the technique itself with the pinch pot technique and, for drying, see how to dry pottery without cracking.
Where this content comes from
This article summarizes chapter 1 of Ceramics by Hand — Foundations and Techniques Without a Wheel, a literature-based guide compiled by SenseCraft. It combines technical health and safety guidance, Brazilian regulatory references and manufacturer documentation cited in the sources below with teaching organization, tables and a diagram developed by SenseCraft. The safety guidance comes from sources in different countries and is used for general prevention; the Brazilian regulatory reference is identified as such, and readers should check the rules that apply where they live. The first-bowl example, the checklist and the list for the firing service are summaries proposed by SenseCraft from those references, not procedures tested by the company. The writing was supported by AI tools and edited by SenseCraft. To see how the workspace connects to the techniques, go back to the pottery without a wheel guide.
Sources cited
- Health and Safety Executive (UK). CR0 – Advice for managers (PDF), respirable crystalline silica in ceramics.
- Health and Safety Executive (UK). CR3 – Dry fettling (PDF), controlling dust at the source and cleaning.
- Brazilian Ministry of Labor and Employment. NR-26 – Safety Signage (PDF, in Portuguese), labeling and safety data sheets.
- Mayco. Consumer Product Information Sheet – Fundamentals (PDF), application stages and the limits of a consumer information sheet.
- University of Nebraska–Lincoln. Ceramics Safety Policies, cleaning, hygiene and keeping kitchen utensils separate.
- Rhonda Willers, Pottery Making Illustrated. Custom Work Table/Workspace, organizing a home studio.
- L&L Kiln. Kiln Installation Overview and First Firing Instructions, installation and controller limits.
- The Edward Orton Jr. Ceramic Foundation. Pyrometric Cones, cones and heatwork.
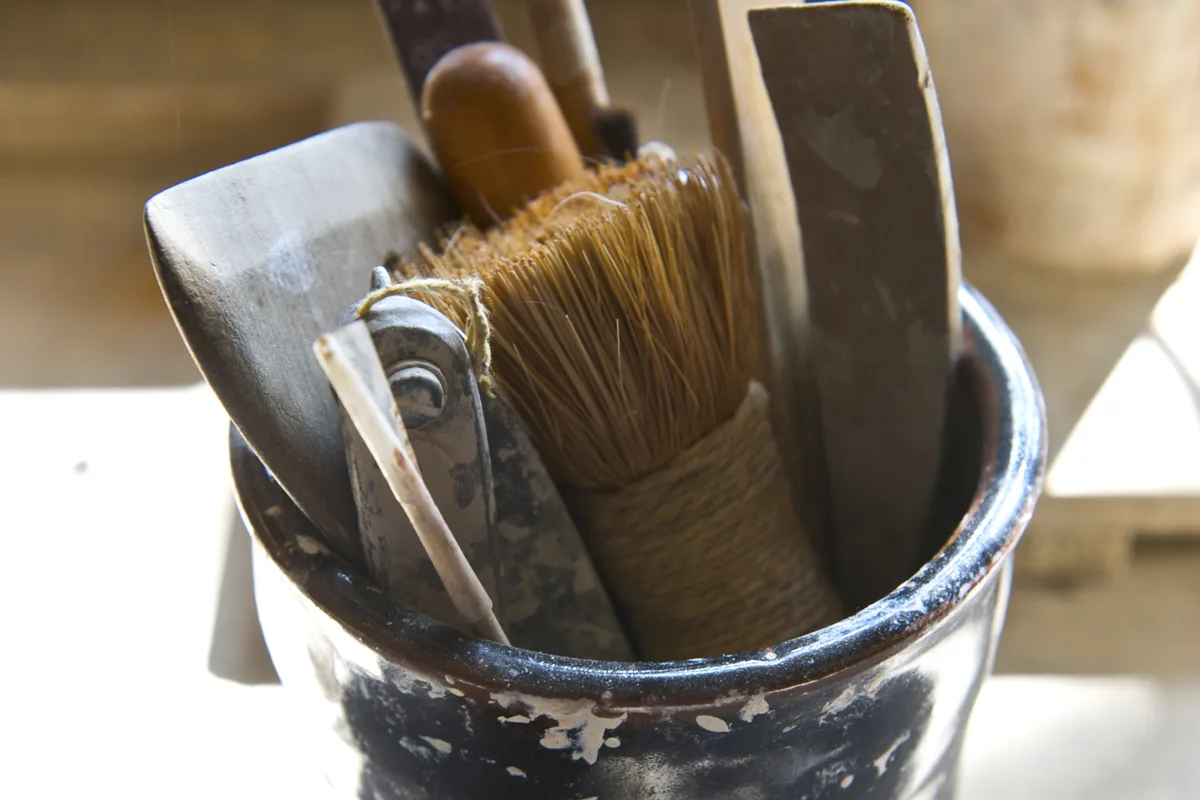
Cover image: Bernard Leach Pottery Studio St.Ives Tools (3983811907).jpg, photo by THOR (Flickr) on Wikimedia Commons, CC BY 2.0 license. Cropped and resized by SenseCraft.

Limits
- This article is a synthesis of published sources, not the result of SenseCraft testing. It gives no furniture dimensions, ventilation flow rates or drying times.
- The dust, cleaning and waste guidance is general prevention for wet work with identified materials. It does not replace the product's safety data sheet, a professional assessment or your local rules.
- A piece that looks good, is dry or has been fired is not thereby fit for food, hot drinks or holding water; that assessment depends on the clay body, glaze, firing and specific checks.
Basis: literature review — original article based on the October 2026 Portuguese edition of the SenseCraft handbuilding book, chapter 1. The corresponding material is also available in English in Ceramics by Hand — Foundations and Techniques Without a Wheel (November 2026 edition), with primary sources listed at the end.